Add Custom Fitment Data with Metafields
Add Fitment Data to Product
Section titled “Add Fitment Data to Product”You can add fitment data to the product using the convermax.fitment metafield.
-
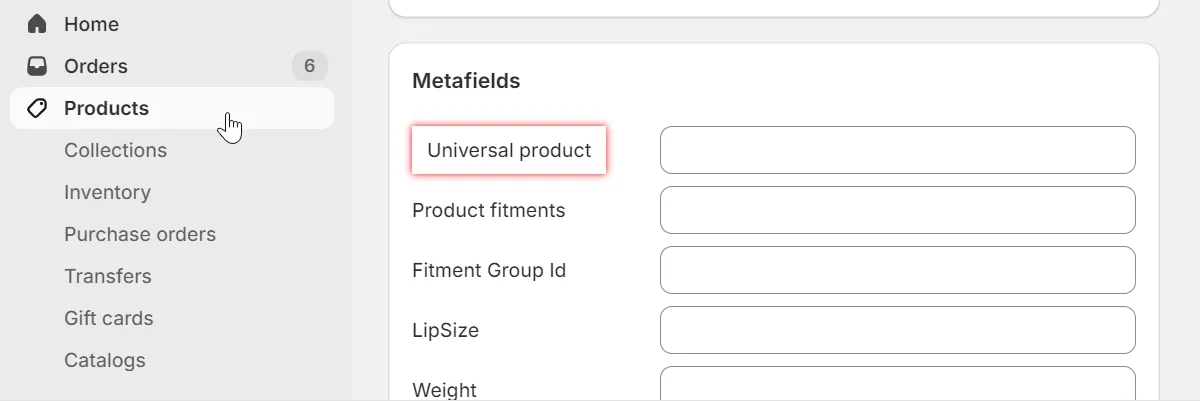
In your Shopify admin panel, go to Products.
-
Select the desired product.
-
Scroll down to the Metafields section.
-
Click on the Product fitments metafield.
-
Edit fitment data:
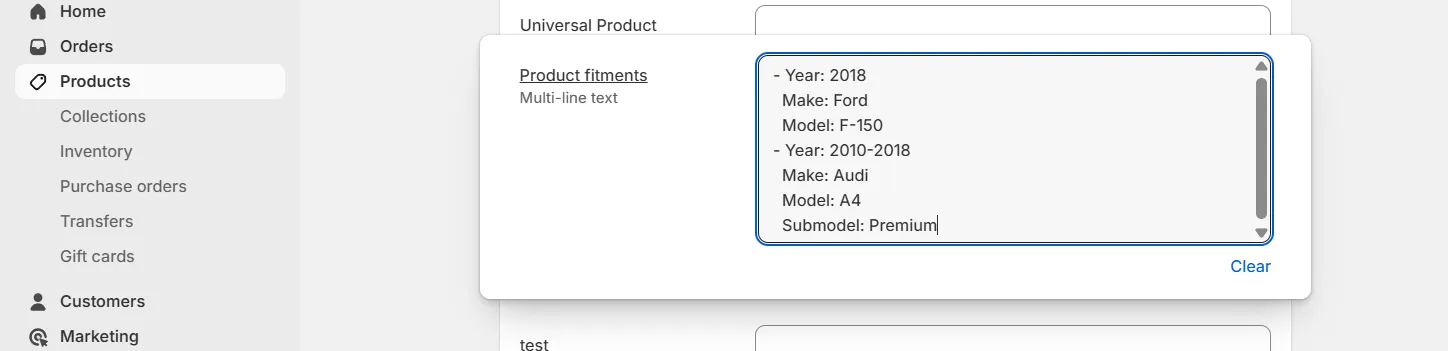
- Enter fitment data using a YAML array of objects. Start each fitment with
-and indent following lines by two spaces to form a valid YAML object. For example:
- Year: 2018Make: FordModel: F-150- Year: 2010-2018Make: AudiModel: A4Submodel: Premium- Click Save.
- Enter fitment data using a YAML array of objects. Start each fitment with
Formats for Years:
- Single year:
2017. - Range:
2017-2020. - Multiple years:
2017,2019,2020. - Up to the next year:
2017+(equivalent to2017-2026).
Multiple Values: Values for Year, Model can be separated by commas.
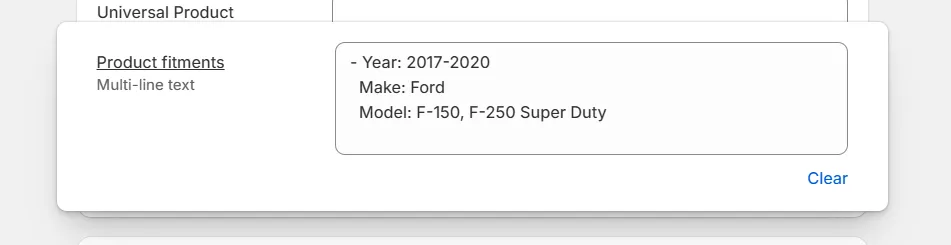
Multiple Entries: Start each fitment with - to create multiple items.
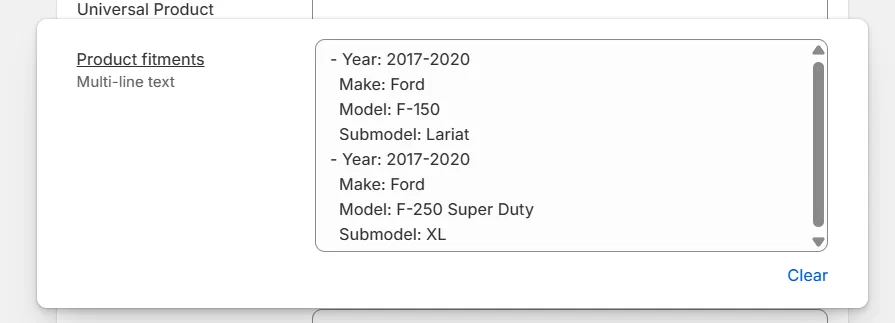
Submodel: If the part fits all submodels, you can leave the Submodel field empty.

Make Product Universal
Section titled “Make Product Universal”You can make a product universal using the convermax.universal metafield.
- In your Shopify admin panel, go to Products.
- Select the desired product.
- Scroll down to the Metafields section.
- Click on the Universal product metafield.
- Edit fitment data:
- Set the toggle option to
Trueto indicate that the product is universal. - Click Save.
- Set the toggle option to
Make collection products Universal or Non-Vehicle
Section titled “Make collection products Universal or Non-Vehicle”You can mark all products within a collection as universal or non-vehicle specific using the convermax.fitment_type metafield.
- In your Shopify admin panel, go to Collections.
- Select the desired collection.
- Scroll down to the Metafields section.
- Click on the Fitment Type metafield.
- Edit fitment data:
- Select
Universal FitorNon-Vehicle Productsoption if the collection contains such products. If one of the options is selected, the YMM widget will be hidden on this collection. - Click Save.
- Select
