Adding Promotion banners to Product Listing
1. Create a Metaobject Definition via Shopify Admin Settings
Section titled “1. Create a Metaobject Definition via Shopify Admin Settings”This metaobject is used to configure promotion banner data.
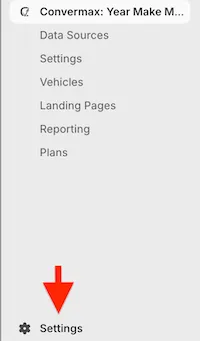
- Go to the Settings: Admin → Settings at the bottom of the page → Metafields and metaobjects
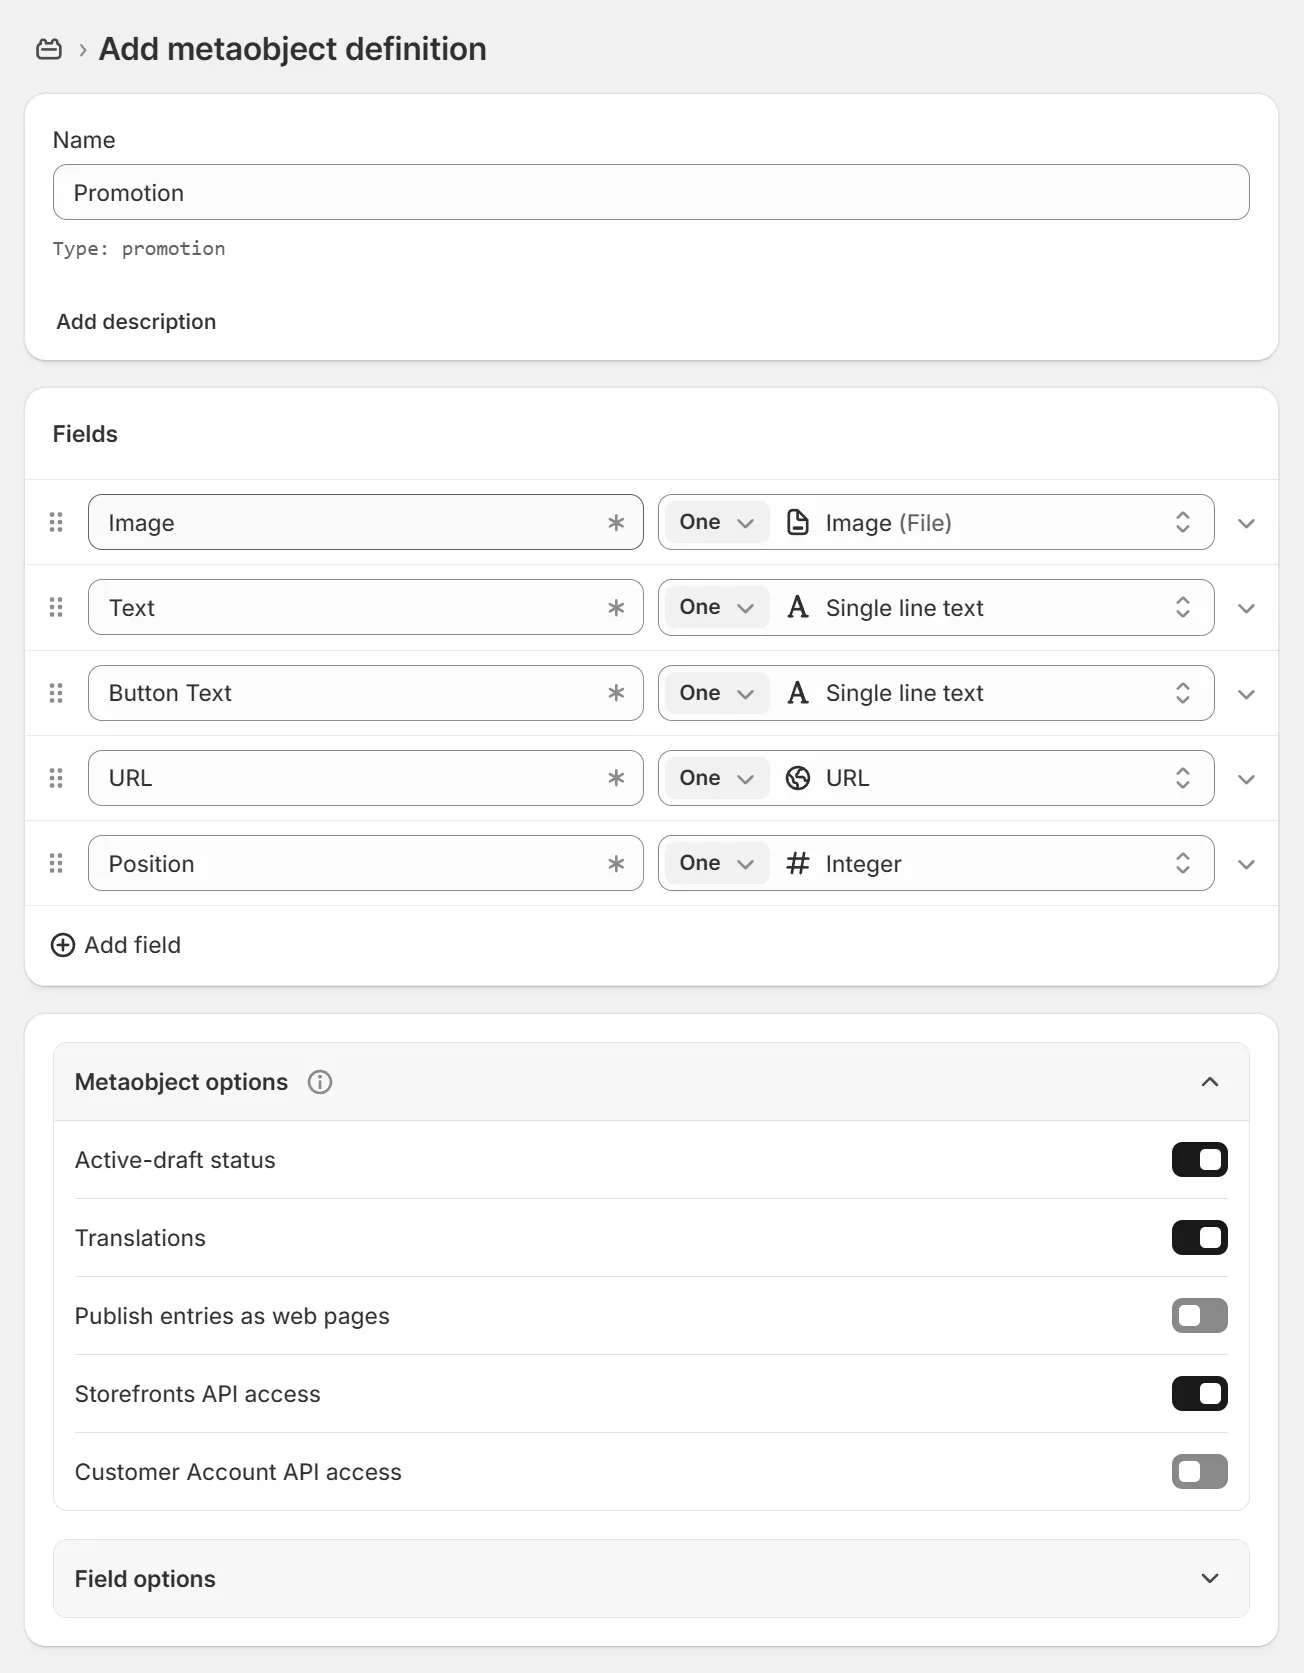
- The definition name is “Promotion”. Make sure the type is also “promotion”. Add the definition fields - Image, Text, Button Text, URL, Position:
-
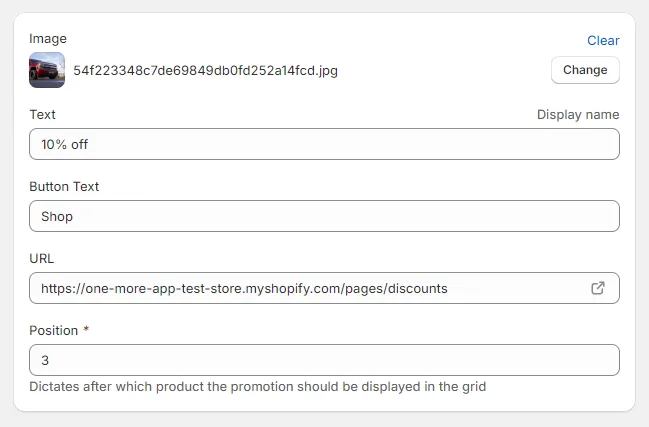
Image (type: One Image(File))
The image of your banner.
-
Text (type: One Single line text)
The text that should be displayed on the banner.
-
Button Text (type: One Single line text)
The button text that should be displayed on the banner.
-
URL (type: One URL)
The URL to which the banner should redirect customers when clicked.
-
Position (type: One Integer)
Dictates after which product the promotion should be displayed in the grid.
- Click Save.
2. Create a Metafield Definition
Section titled “2. Create a Metafield Definition”This metafield is used to associate metaobjects with the collections to which promotions need to be shown.
-
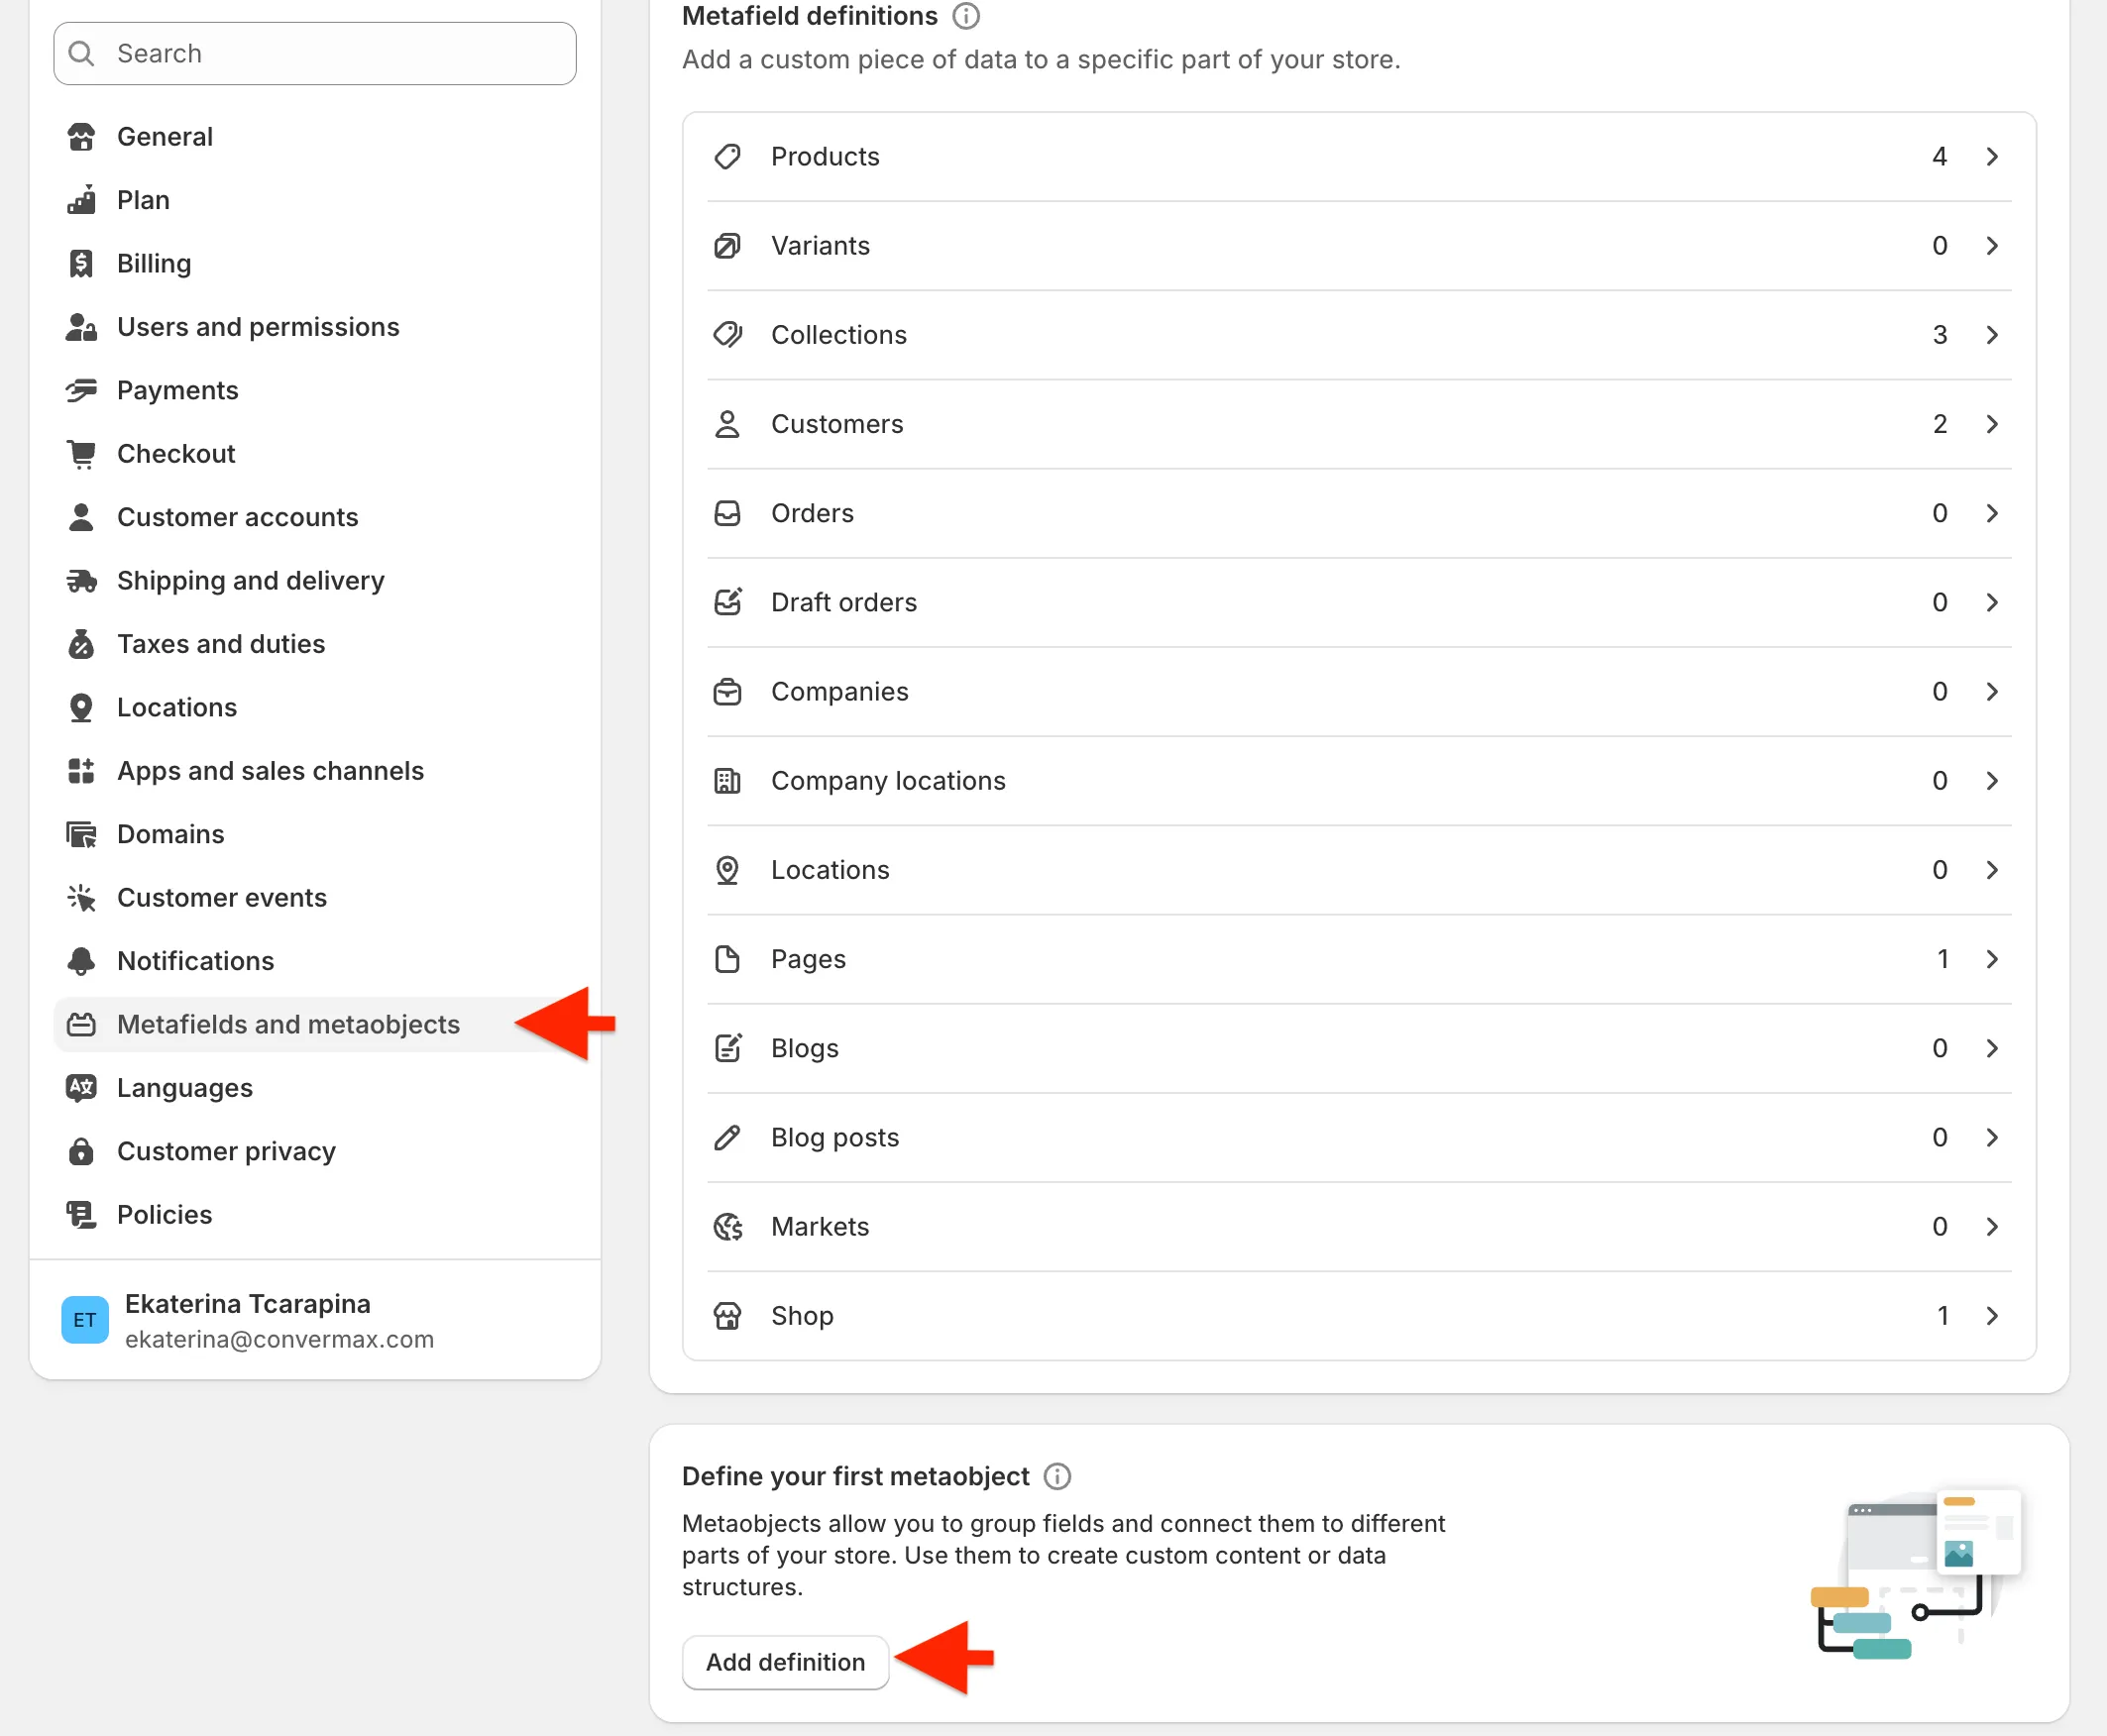
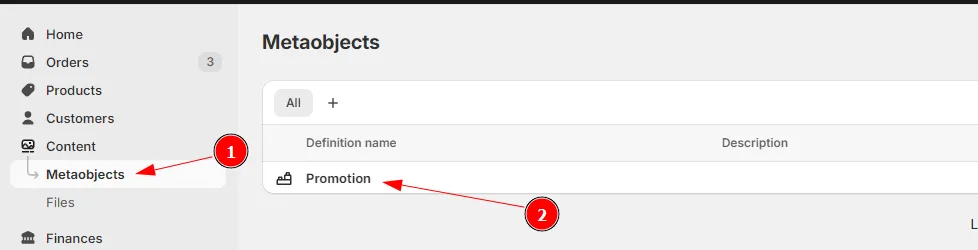
Go to Settings → Metafields and metaobjects → Collections.
-
Click “Add definition”.

- Configure the definition as follows:
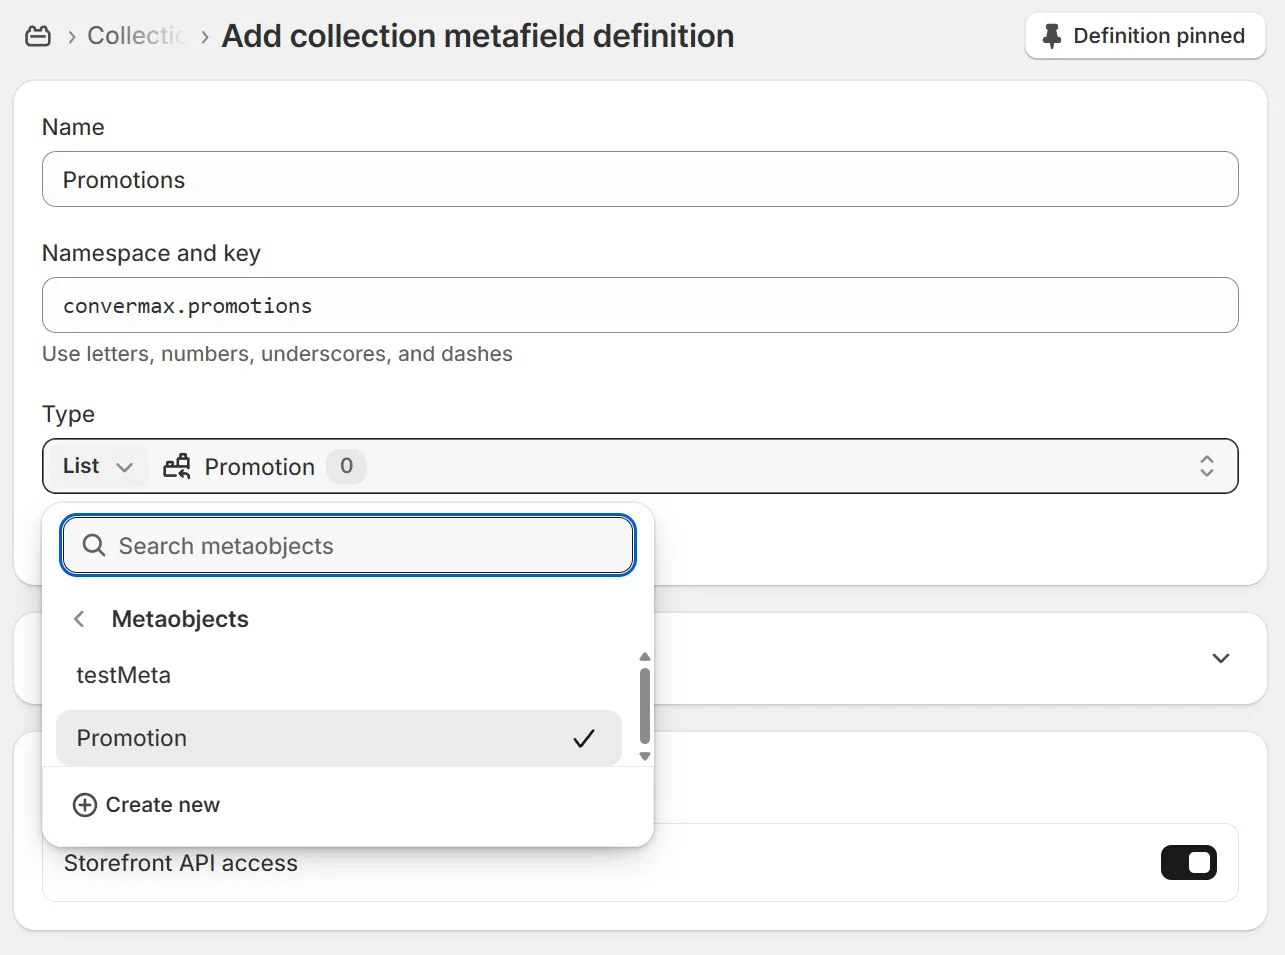
- Name: Promotions
- Namespace and key:
convermax.promotions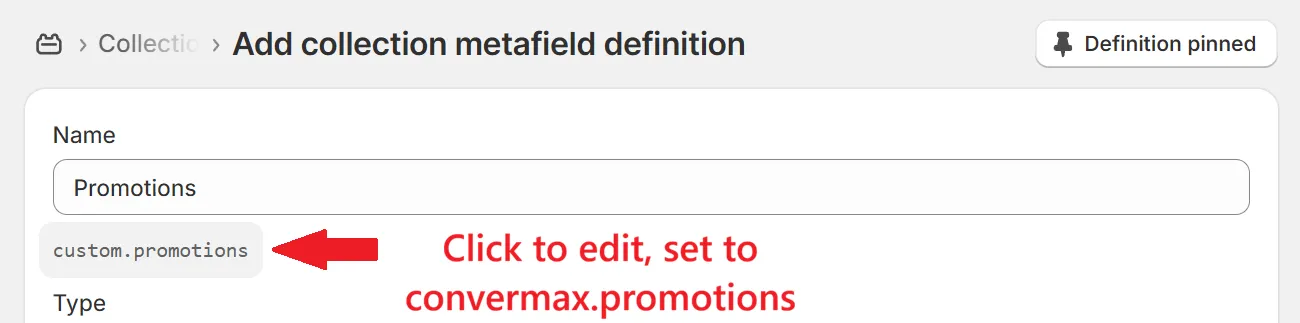
- Type: Select List, then on the dropdown select Metaobjects → Promotion
- Click Save.
3. How to Use
Section titled “3. How to Use”- Go to Content → Metaobjects and click on the Promotion metaobject.
-
Add a promotion entry and populate the promotion data.
For example:
- Go to the collection in which you want to show the promotion and select entries in the “Promotions” metafield.
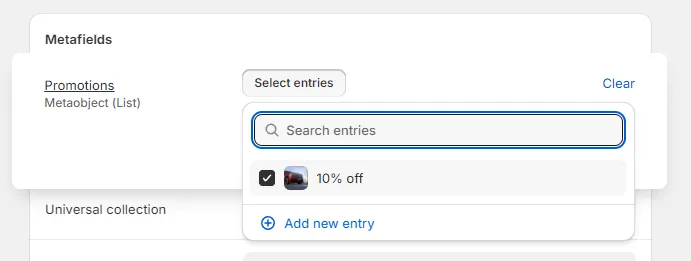
You can add multiple banners to a collection by creating multiple metaobject entries.