Shopify App Configuration
Installation
Section titled “Installation”To install Year Make Model Fitment Search in your store, click “Install app”.
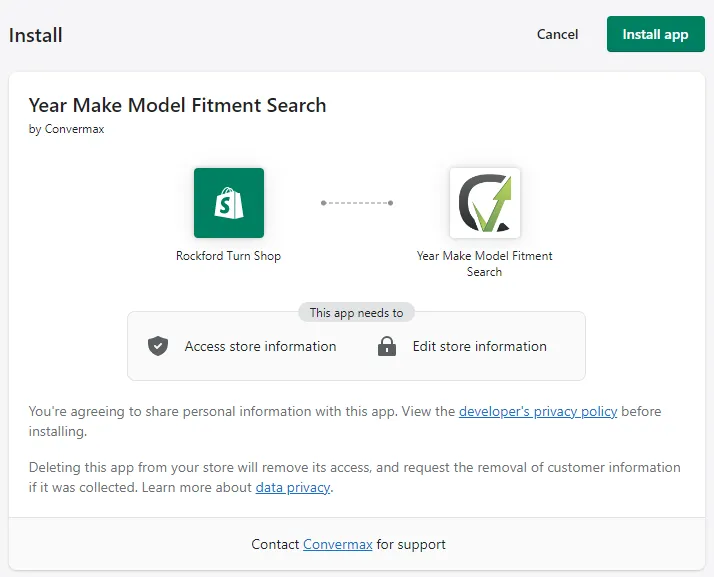
For the search to work, Convermax Year Make Model Fitment Search needs access to your:
- Collections, products, and blog posts to index them
- Script tags and Themes to install the frontend implementation
Setting Up Fitment Resources
Section titled “Setting Up Fitment Resources”There are several ways to configure fitment data for the app.
Product tags
Section titled “Product tags”You can tag all the products with the format shown in the example: 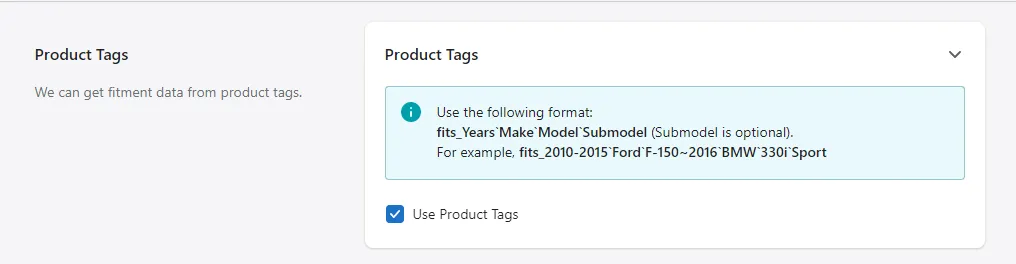
Metafields
Section titled “Metafields”You can use metafields. Metafields templates are auto-generated by our app.
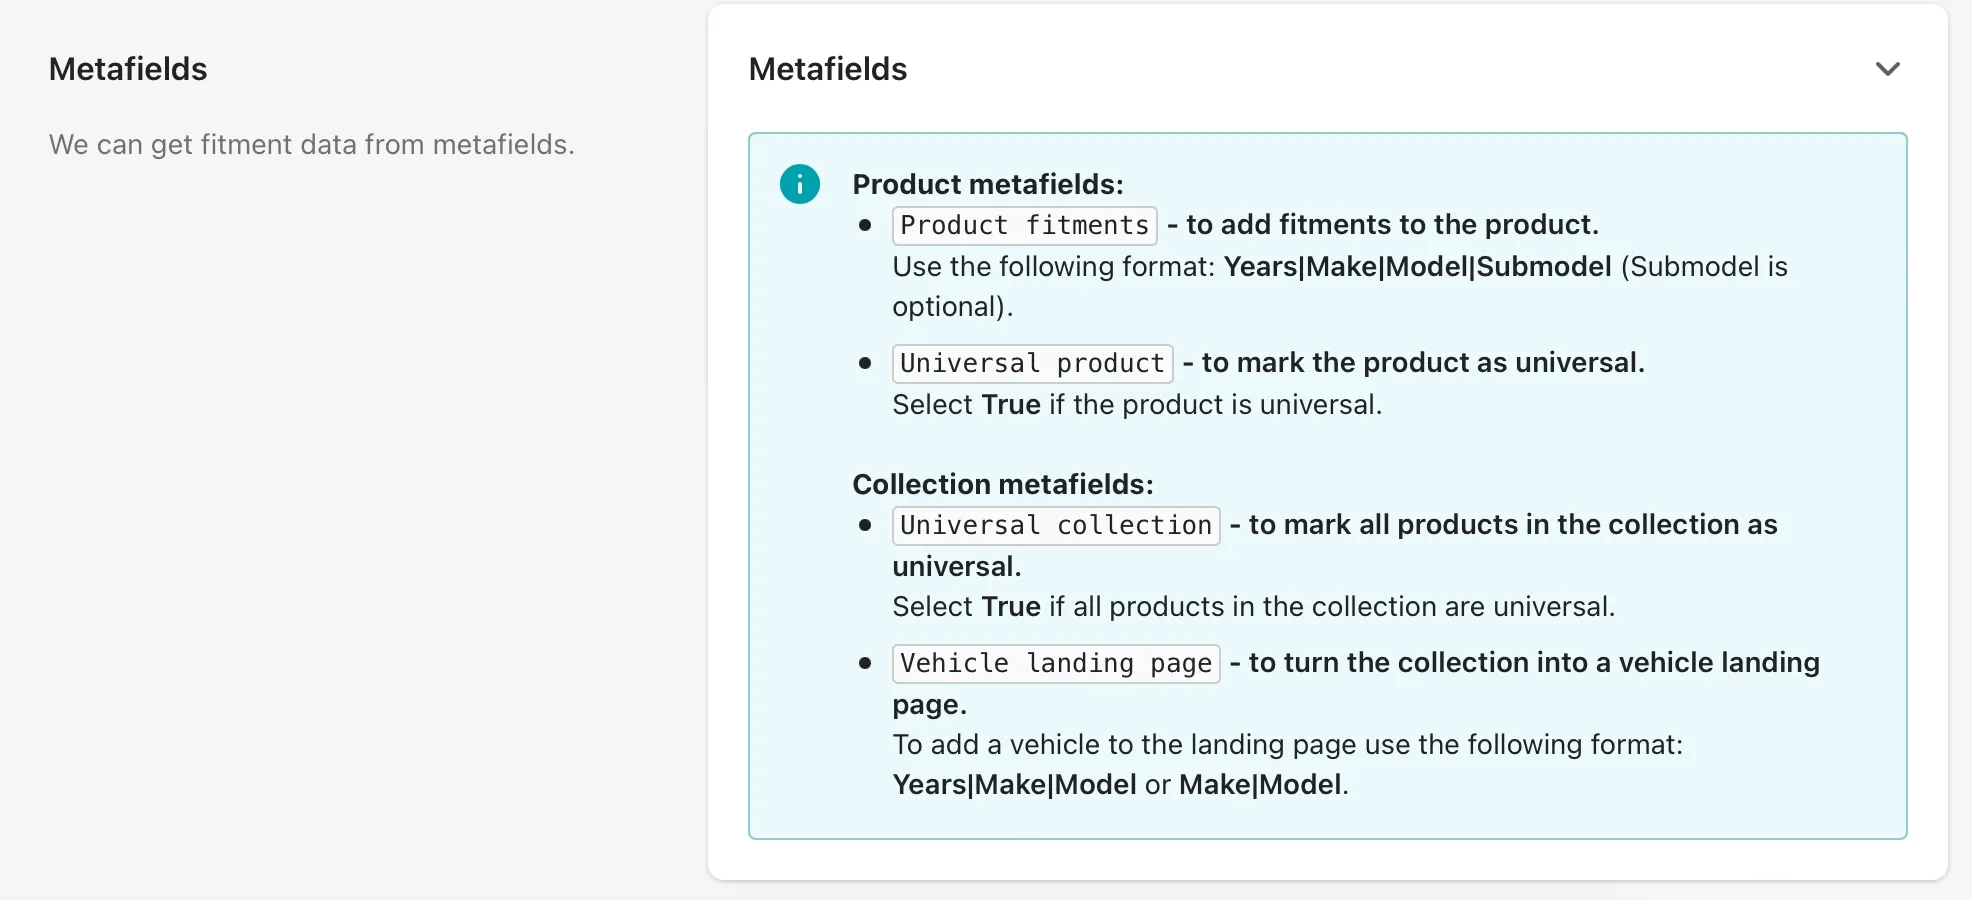
Then you can go to product metafields and assign the fitment data as shown in the example.

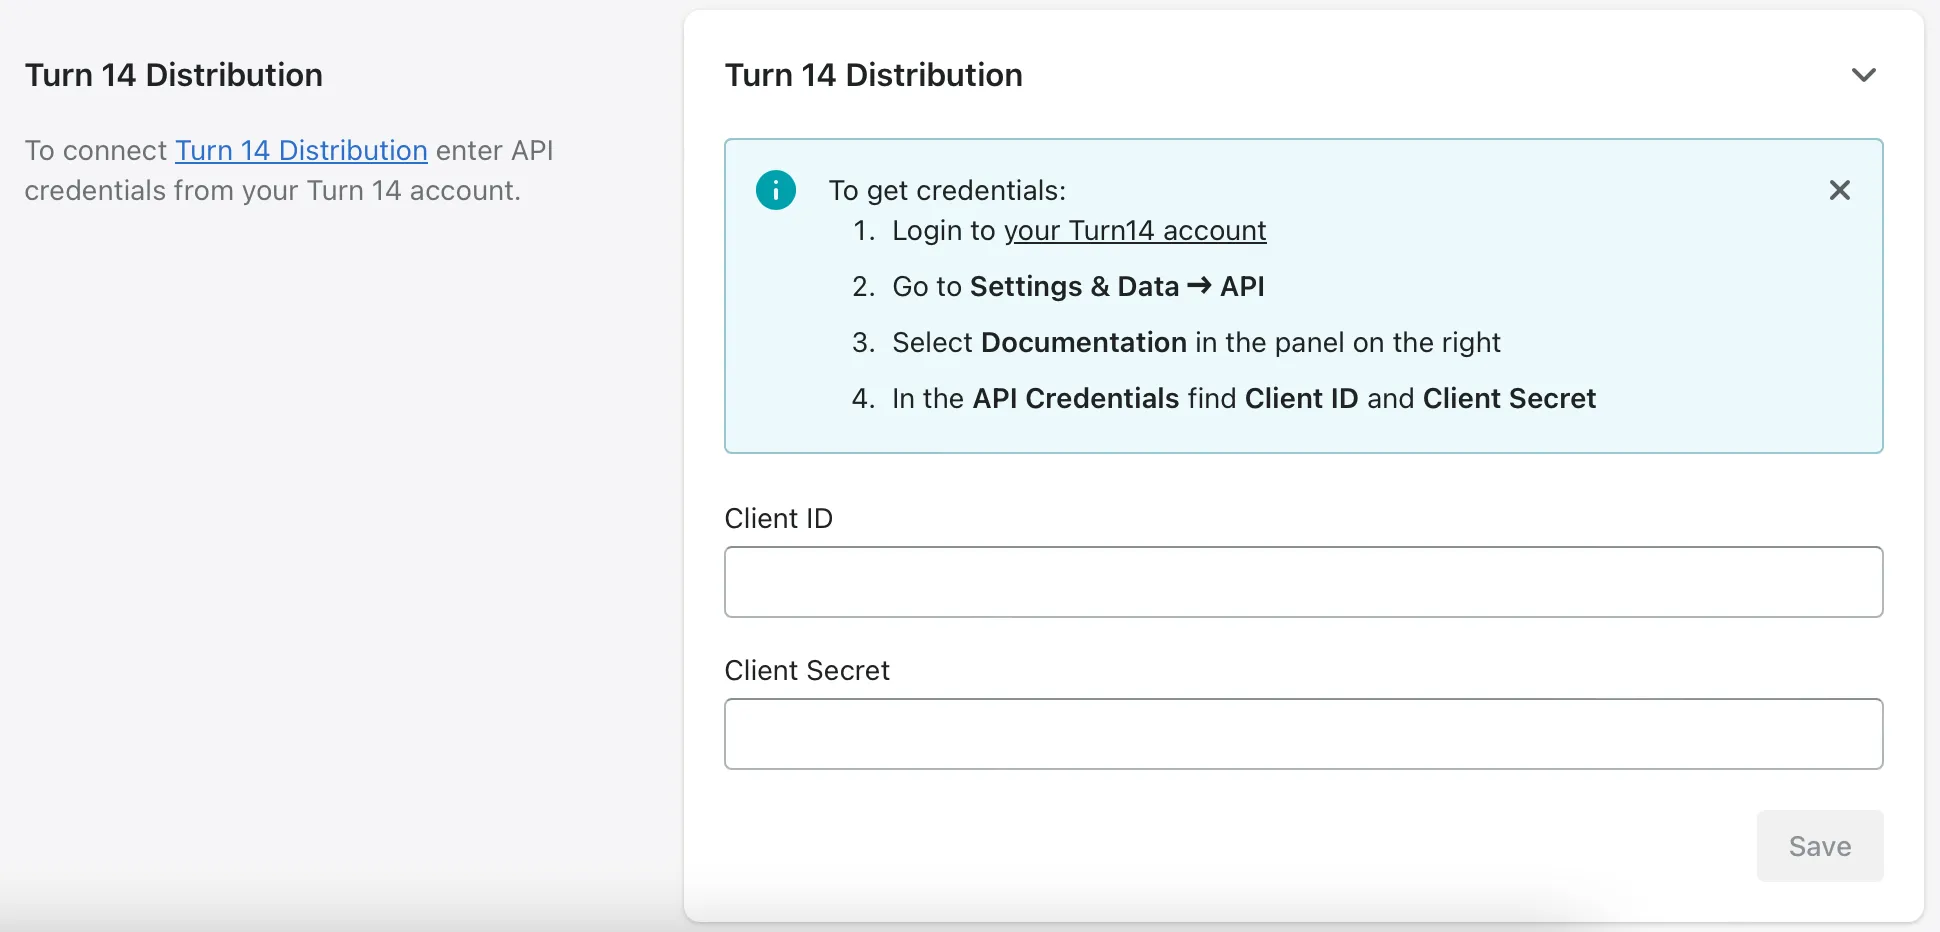
Turn 14 Distribution
Section titled “Turn 14 Distribution”If you have a Turn 14 account, you can connect it via API to the Year Make Model Fitment Search app.
Go to the Turn 14 website and sign in to your account. Go to Settings & Data → API → Documentation. On the API Credentials page, find your Client ID and Client Secret, and copy them. Go back to the app configuration, enter them in the blank fields, and confirm by clicking Save.
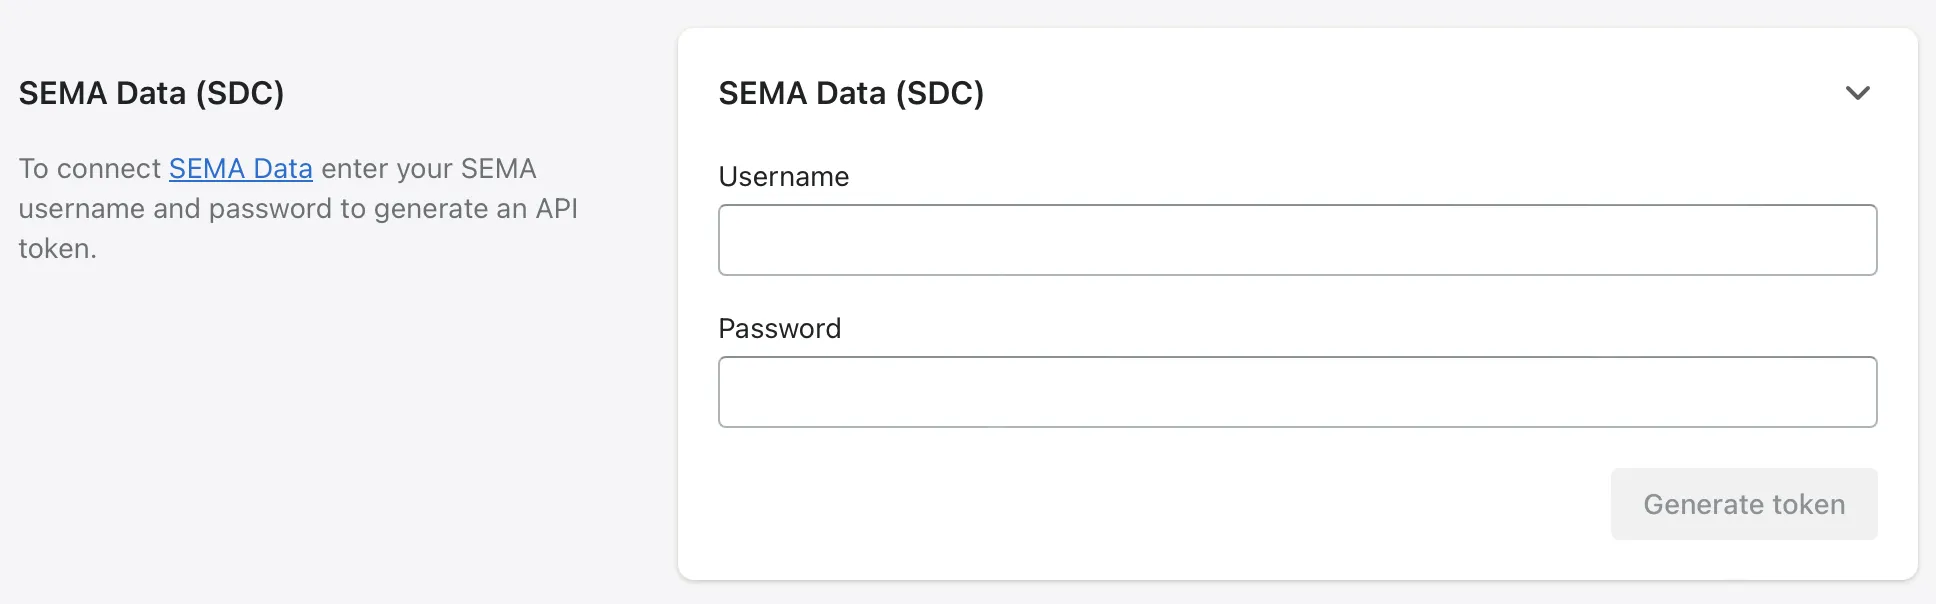
SEMA Data (SDC)
Section titled “SEMA Data (SDC)”Our app has a direct connection with SEMA Data - you just need to enter your SEMA username and password to generate an API token.
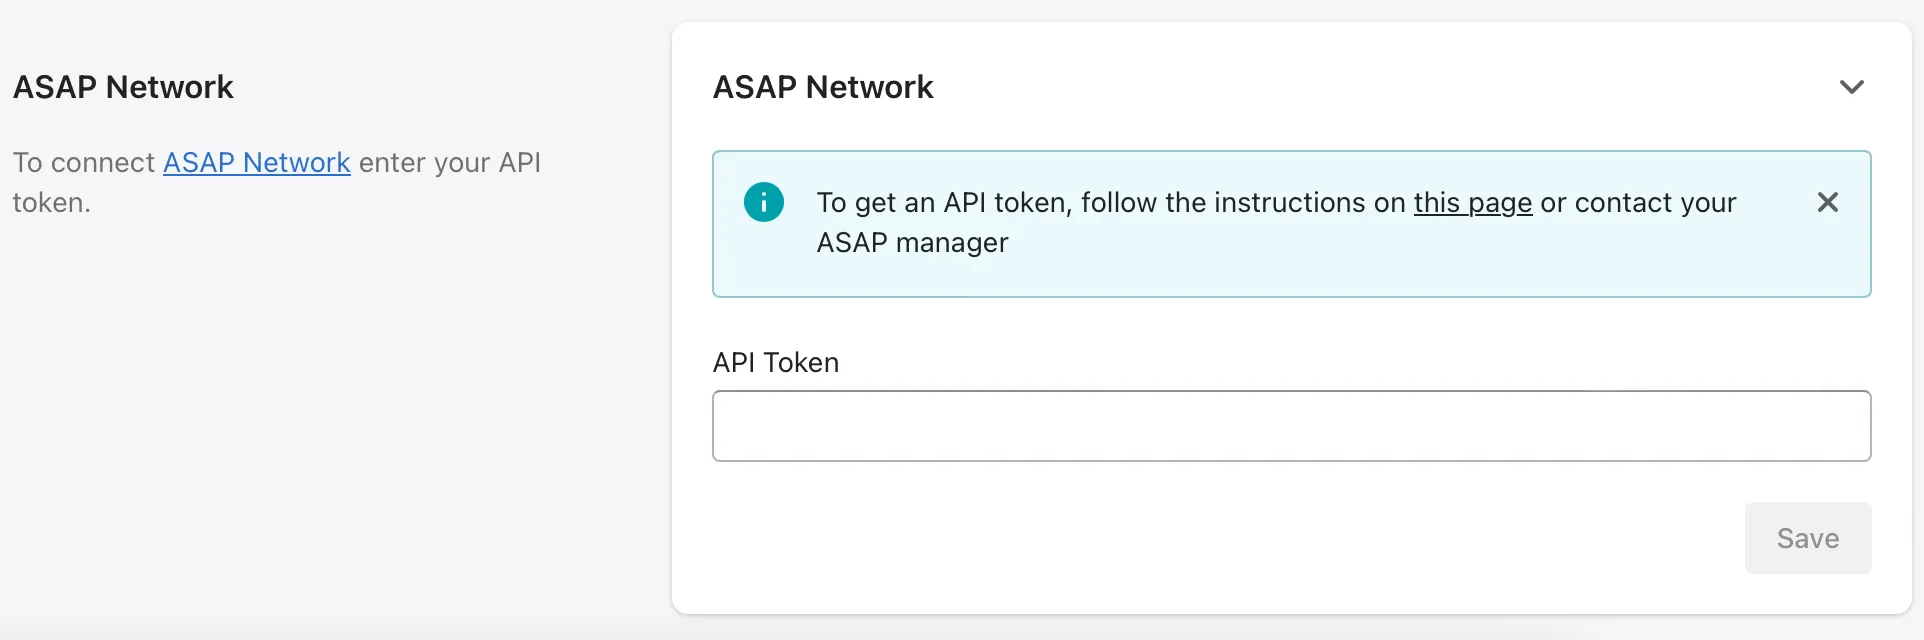
You can connect your ASAP account to the app. Go to the ASAP API page and log in to your account. Follow the instructions to generate your API token or ask for help from your ASAP manager. Enter the token in the blank field and confirm by clicking Save.
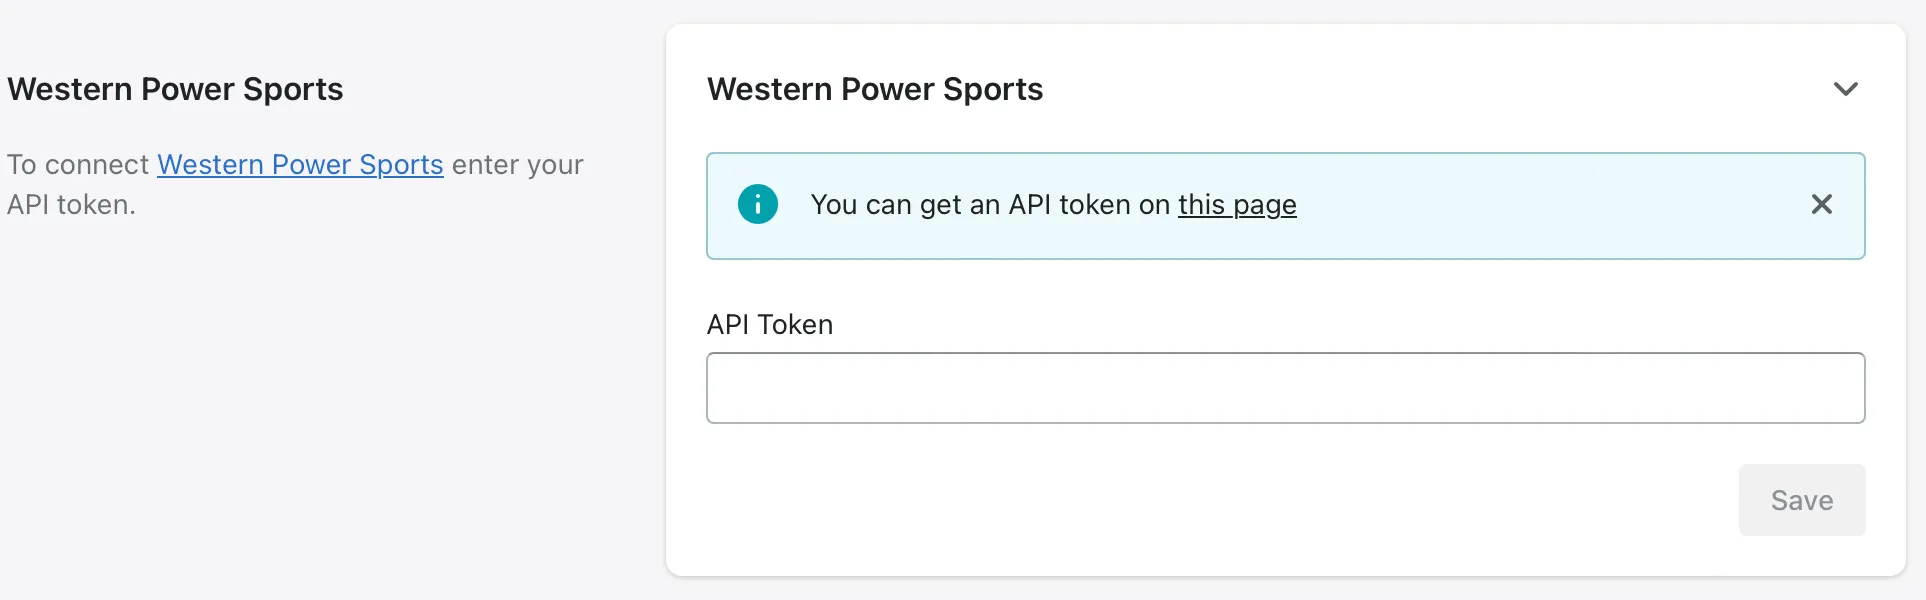
WPS (Western Power Sports)
Section titled “WPS (Western Power Sports)”If you have a WPS account, you can connect it to the app to pull fitment data. Go to the WPS website, login into your account, and copy your API token. Enter it in the blank field and confirm by clicking Save.
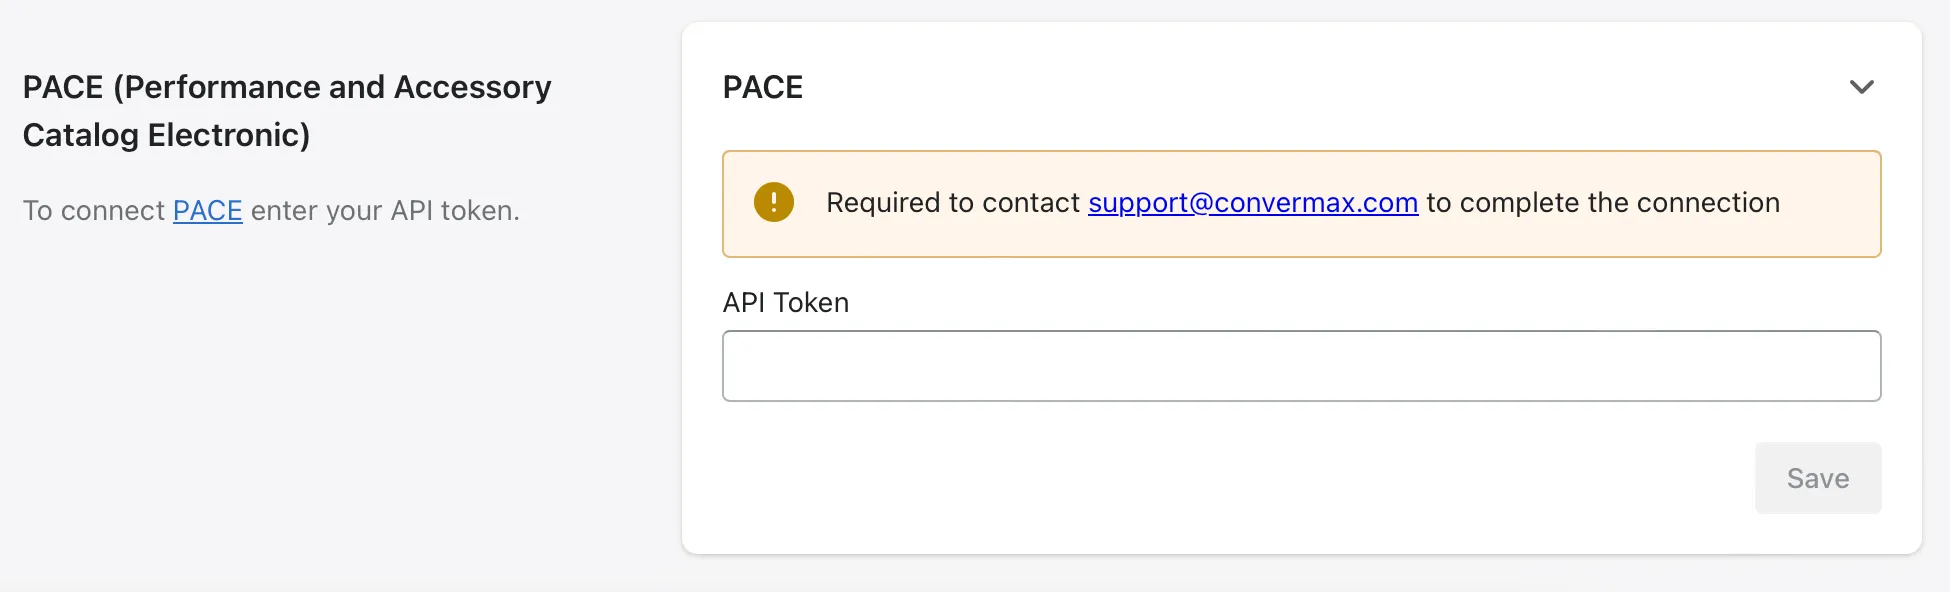
PACE (Performance and Accessory Catalog Electronic)
Section titled “PACE (Performance and Accessory Catalog Electronic)”You can connect your PACE account to the Year Make Model Fitment Search app, but you will need the help of one of our engineers. Please contact [email protected].
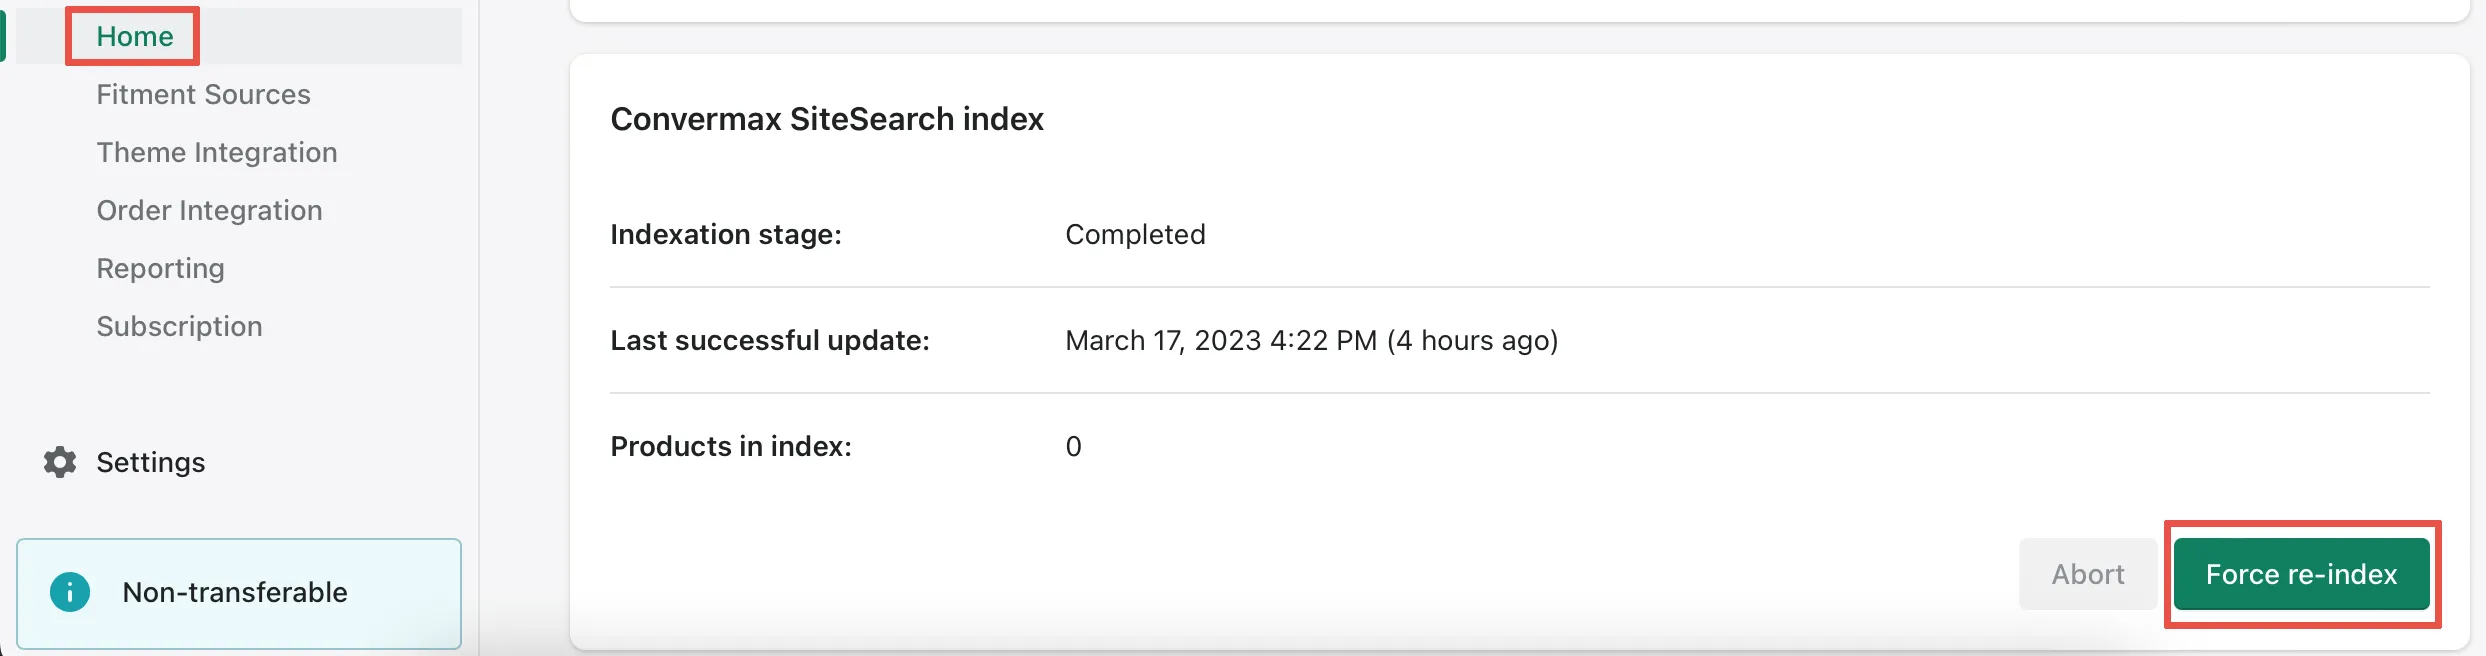
Re-index after connecting fitment sources
Section titled “Re-index after connecting fitment sources”❗After configuring one or all of the fitment resources, switch to the Home tab of the app, and click on the Force Re-index button. If there were any changes to the fitment data, it would refresh in the app after every new index.
Theme Integration
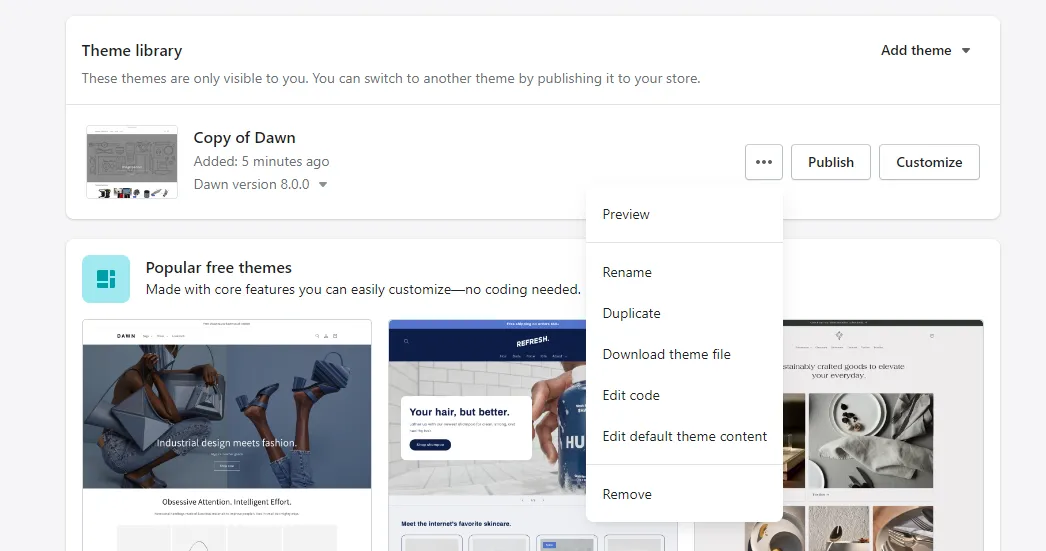
Section titled “Theme Integration”If you’re already running a live store, duplicate the theme you’re using, and implement the Convermax app in that copy.
Duplicating your theme lets you preview changes, check if everything is working fine, and edit your site’s style before it goes live.
To duplicate your theme from the dashboard:
- Go to the Theme Library section
- Toggle the Actions tab from the top right of your desired theme
- Click the Duplicate option
As soon as duplication is complete, go to Customize > App Embeds:

Then select a theme from the drop-down list in the Convermax block:

Also, you can activate a preview of the copy instead of a live theme. It will allow you to preview all changes in the theme copy for a few hours until it switches back to the live theme.
Integrating directly into theme.liquid
Section titled “Integrating directly into theme.liquid”- Custom built .css & .js files:
<link rel="stylesheet" type="text/css" href="https://{{ shop.permanent_domain | replace: 'myshopify', 'myconvermax' }}/static/search.css">
<script src="https://{{ shop.permanent_domain | replace: 'myshopify', 'myconvermax' }}/static/search.min.js" fetchpriority="high"></script>
- Theme package:
<link rel="stylesheet" type="text/css" href="https://{{ shop.permanent_domain | replace: 'myshopify', 'myconvermax' }}/static/THEME_NAME/search.css">
<script src="https://{{ shop.permanent_domain | replace: 'myshopify', 'myconvermax' }}/static/THEME_NAME/search.min.js" fetchpriority="high"></script>
Search and Brand Pages
Section titled “Search and Brand Pages”Right after you install the app, the search page and brand page are automatically created in your store.
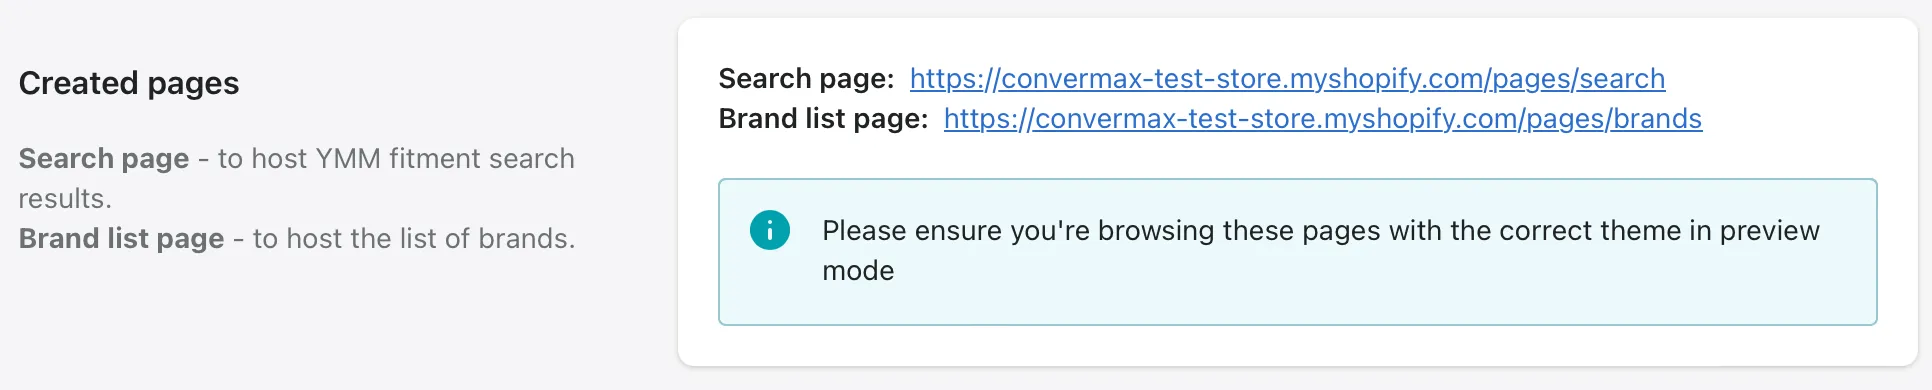
The search page hosts all Year-Make-Model fitment search results.
The brand page hosts the list of all auto parts brands presented in your store.
Year-Make-Model Lookup
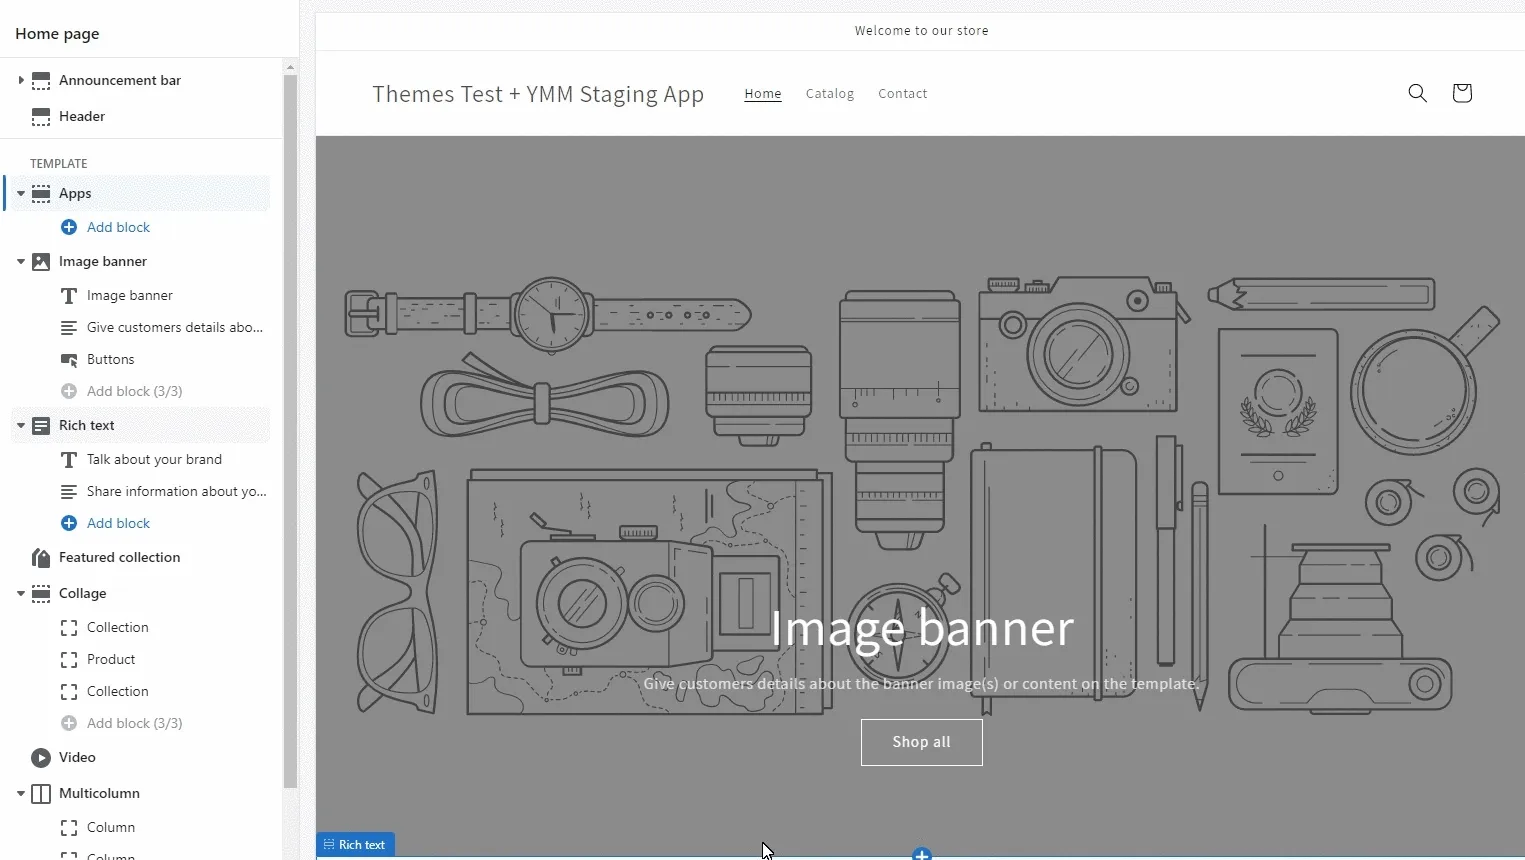
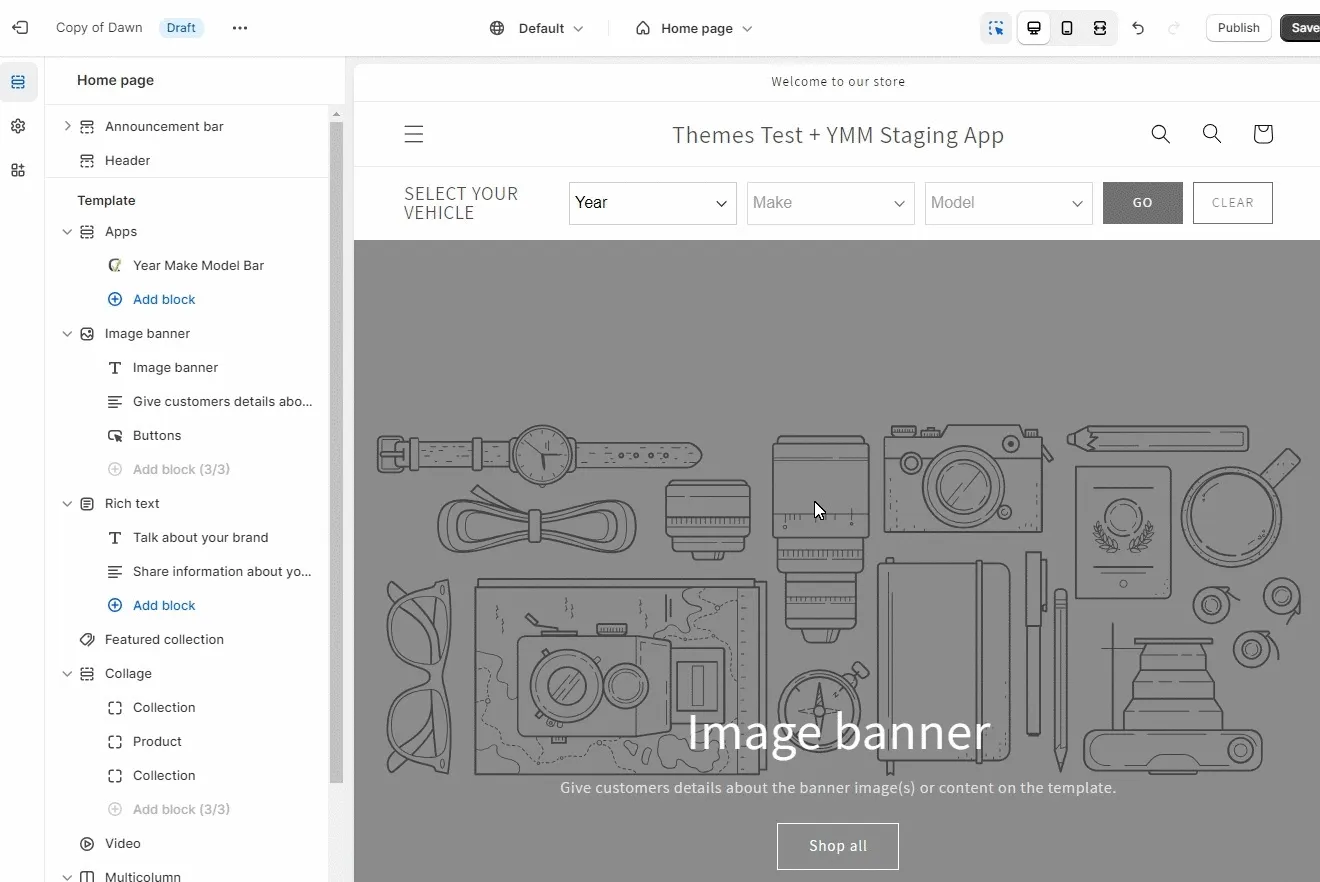
Section titled “Year-Make-Model Lookup”If you have a Shopify Online Store 2.0 theme, it is easy to implement Garage inside the Theme editor.
- Select the “Home page” in the dropdown at the top
- Click Add section in the panel on the left
- Select Year Make Model Bar from the list of Apps
If you have a custom theme that doesn’t support configuration via the Theme Editor, you can add Garage to the code of your theme.
Search Box
Section titled “Search Box”To make the keyword search work synchronously with the year-model-model selection, you need to replace the standard built-in search bar with Convermax. It is enabled automatically when you integrate into one of the topics in the Convermax block drop-down list, except for Generic and Custom Build. For Generic and Custom Build theme, you need to follow the instructions under point b.
Product Page
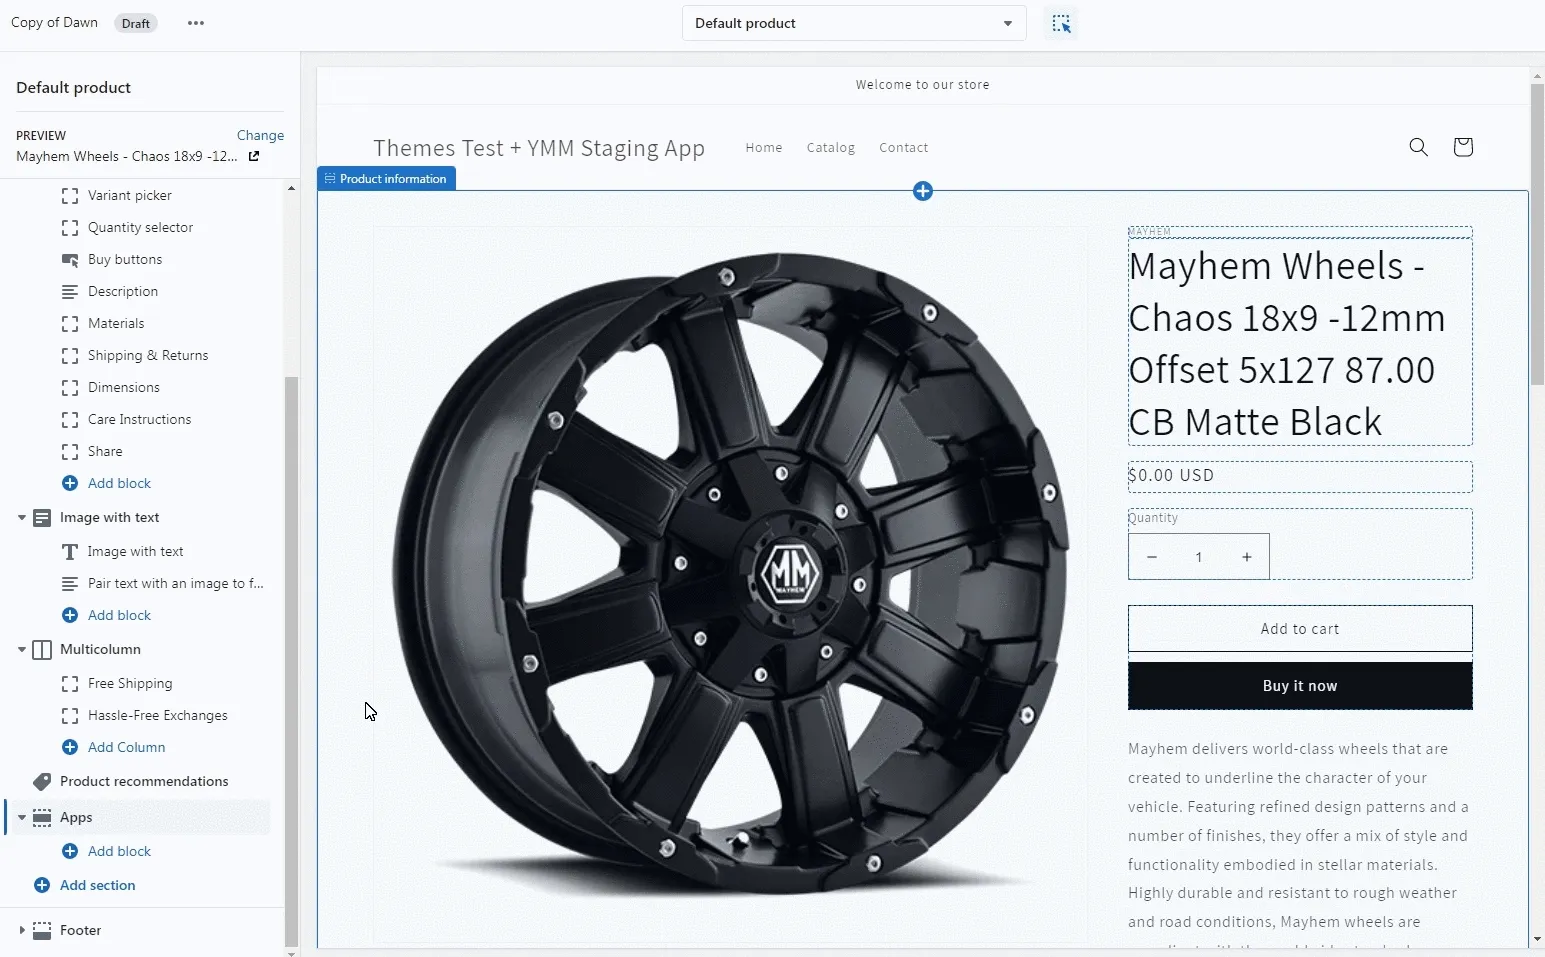
Section titled “Product Page”Verify Fitment
Section titled “Verify Fitment”- Open your Theme Editor.
- Select the “Products” template in the dropdown at the top and pick the “Default product” option.
- Click Add section or Add block in the panel on the left.
- Select Verify Fitment from the list of Apps.
- The block will automatically appear. Drag and place it where you would like it to appear in your store.
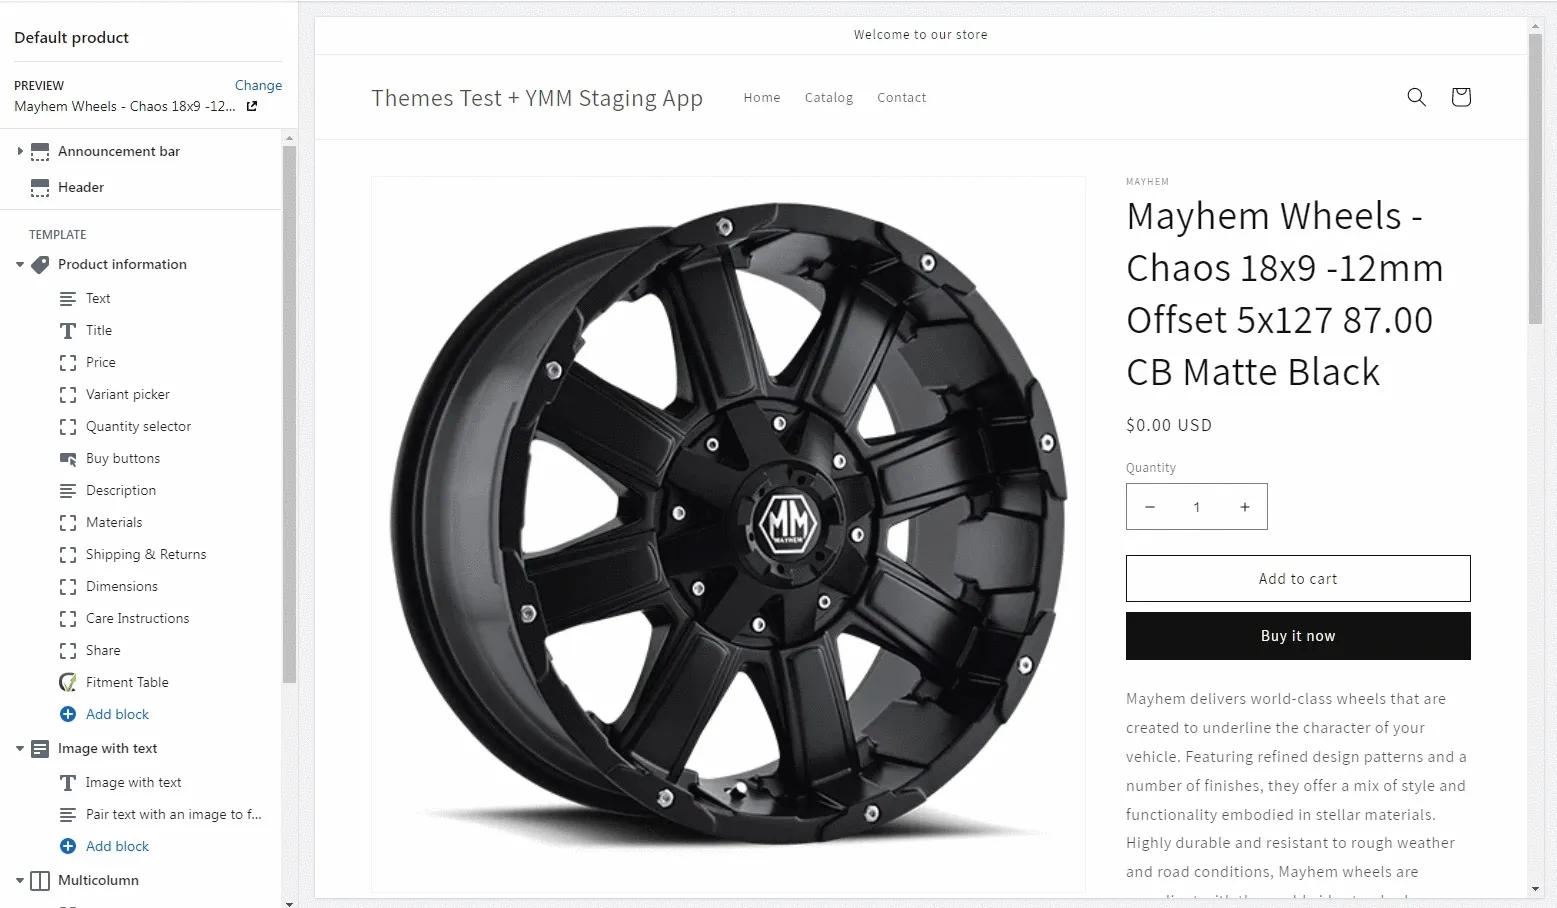
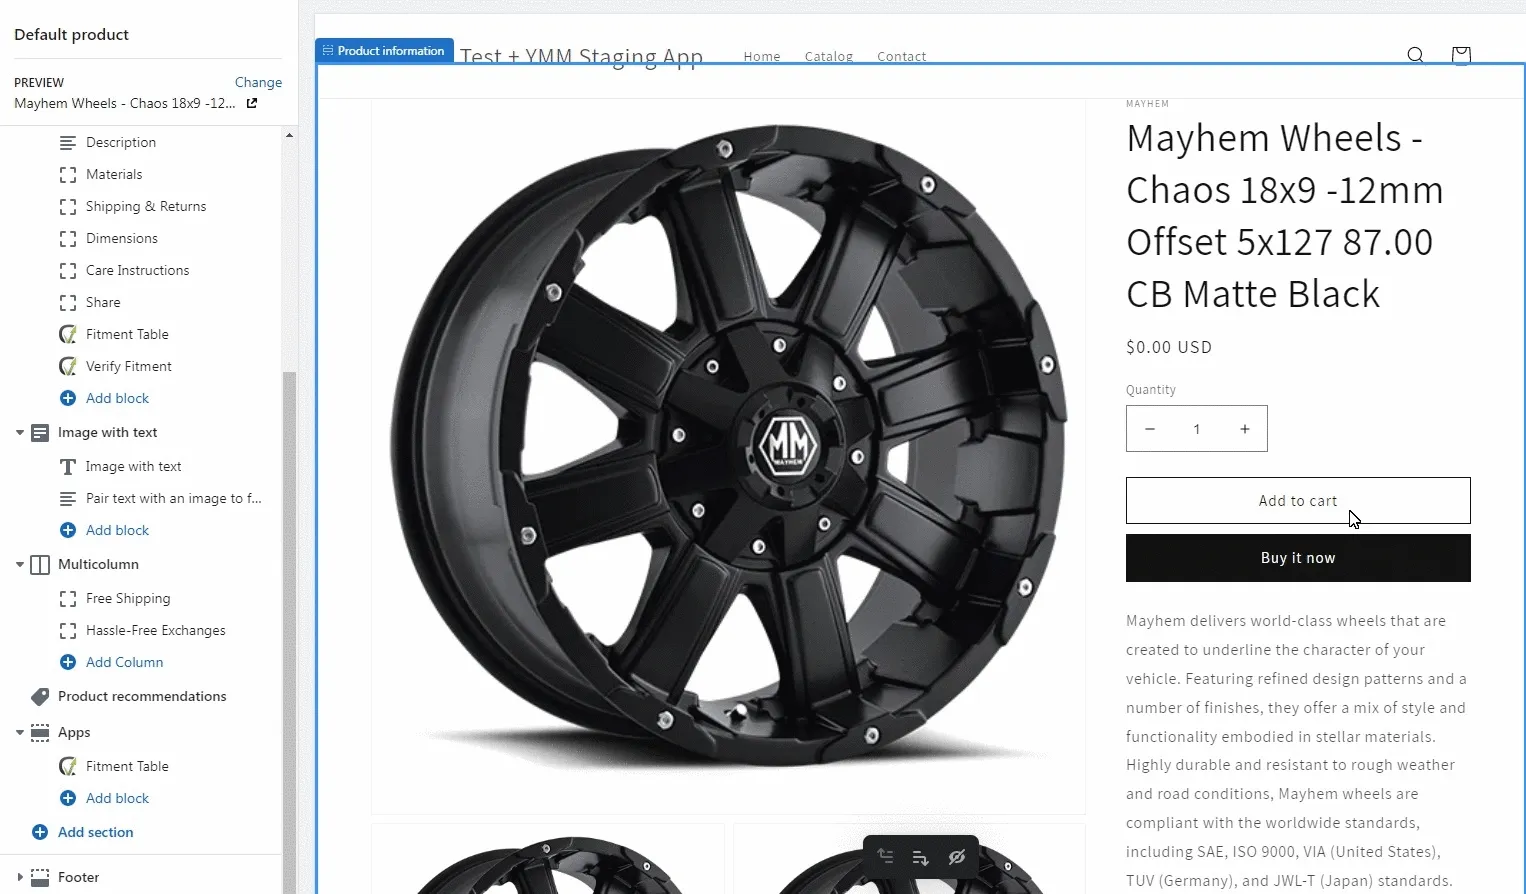
Fitment Table
Section titled “Fitment Table”- Open your Theme Editor.
- Select the “Products” template in the dropdown at the top and pick the “Default product” option.
- Click Add section or Add block in the panel on the left.
- Select Fitment Table from the list of Apps.
- The block will automatically appear. Drag and place it where you would like it to appear in your store.
Related Products
Section titled “Related Products”- Open your Theme Editor.
- Select the “Products” template in the dropdown at the top and pick the “Default product” option.
- Click Add section or Add block in the panel on the left.
- Select Related Products from the list of Apps.
- The block will automatically appear. Drag and place it where you would like it to appear in your store.
Collections
Section titled “Collections”Collection Page
Section titled “Collection Page”- Open your Theme Editor.
- Select the “Collections” template in the dropdown at the top and pick the “Default collection” option.
- Click Add section in the panel on the left.
- Select Product Grid with Filters from the list of Apps.
- Find the default product grid section in the panel on the left and hide it by clicking the eye icon next to the section.
Collection List Page
Section titled “Collection List Page”- Open your Theme Editor.
- Select the “Collection List” template in the dropdown at the top.
- Find the default collection list section in the panel on the left and hide it by clicking the eye icon next to the section.
- Click Add section in the panel on the left.
- Select Collection List from the list of Apps.
