Klaviyo
How Klaviyo works
Section titled “How Klaviyo works”The user leaves their email in the pop-up to unlock an offer and continues to explore the store. While shopping for parts, website visitors often select their vehicle in the year-make-model lookup. Convermax search engine remembers the chosen vehicle and sends it to Klaviyo. So, every email saved inside Klaviyo will have information about the prospective customer’s car.
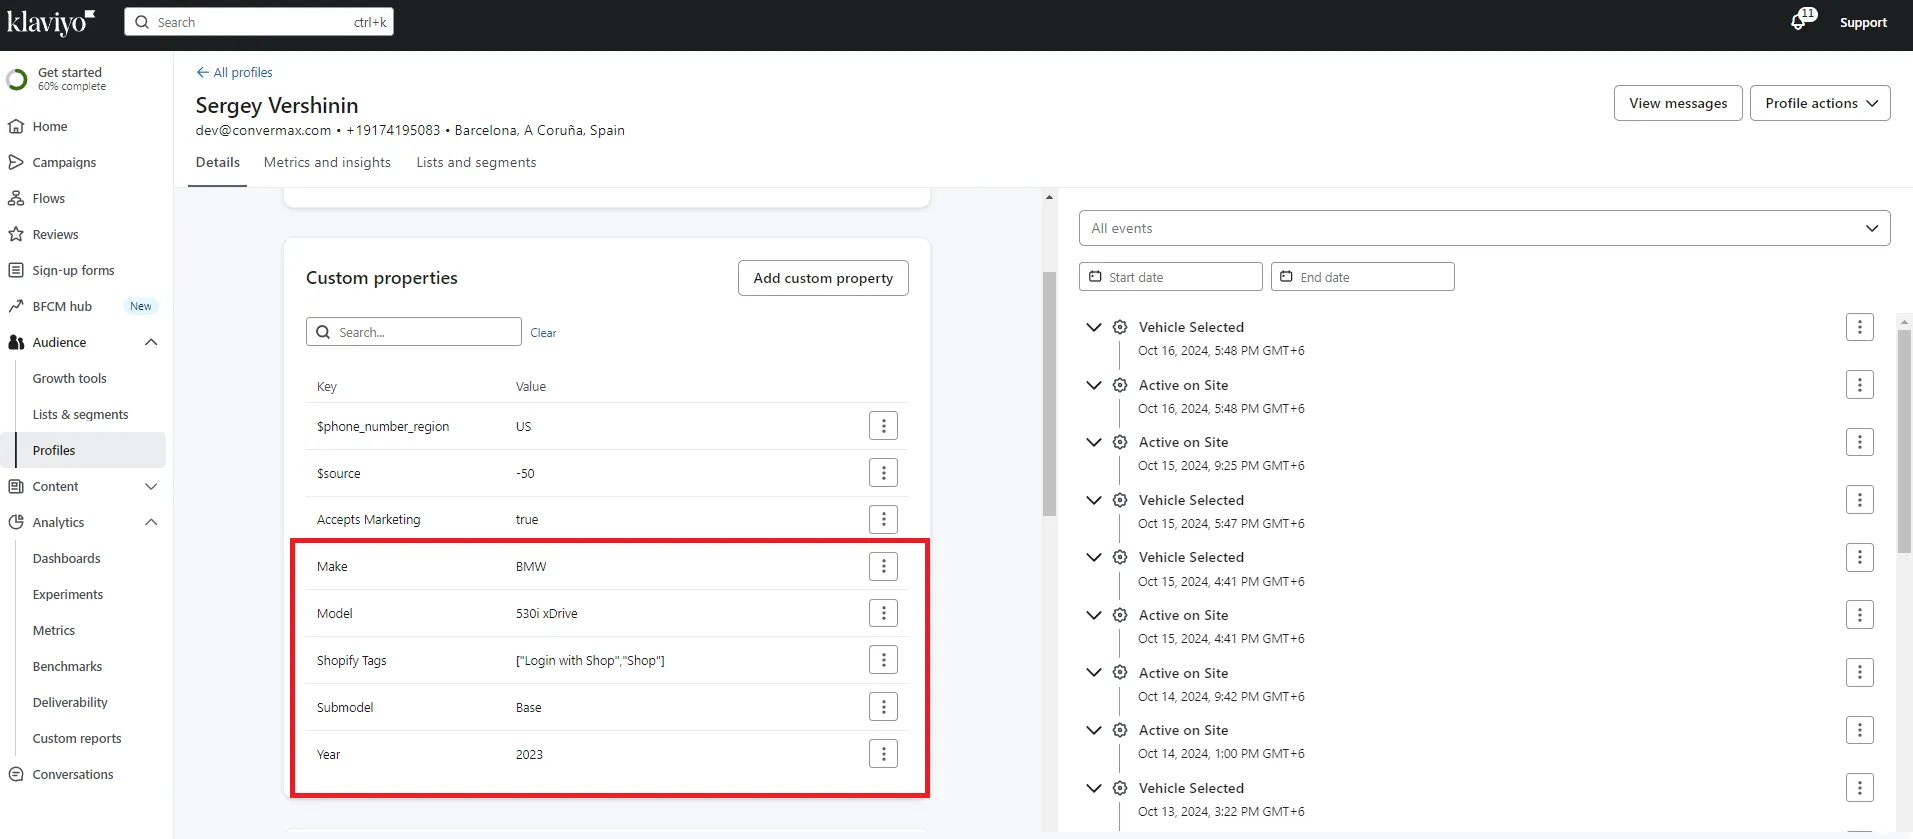
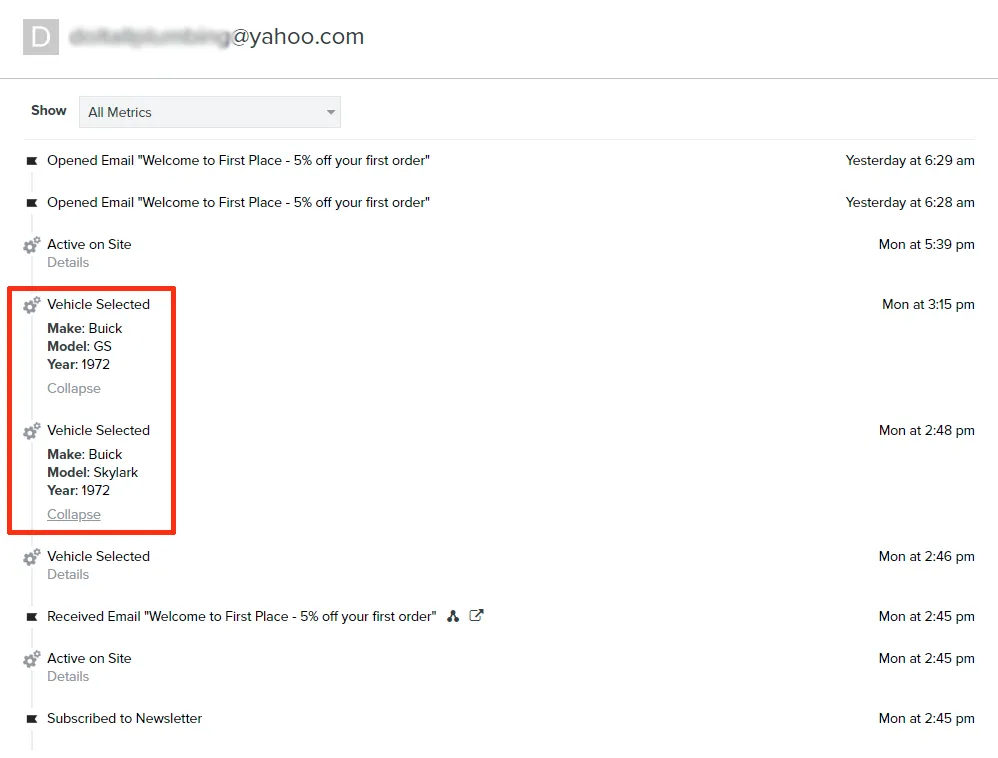
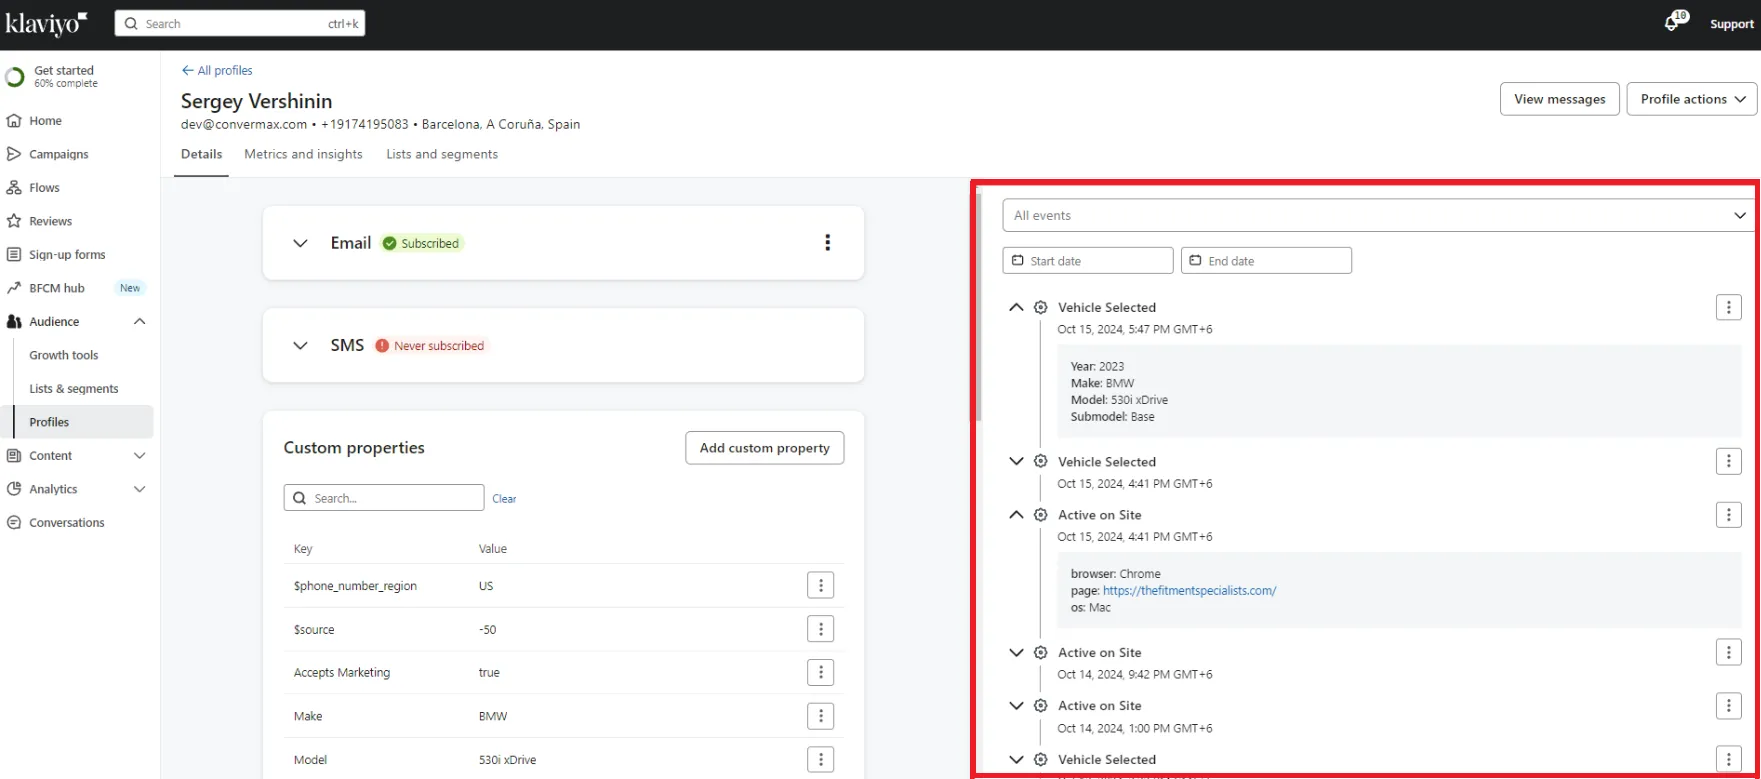
In the profile actions history, the manager can see all vehicles the user selects during the shopping session.
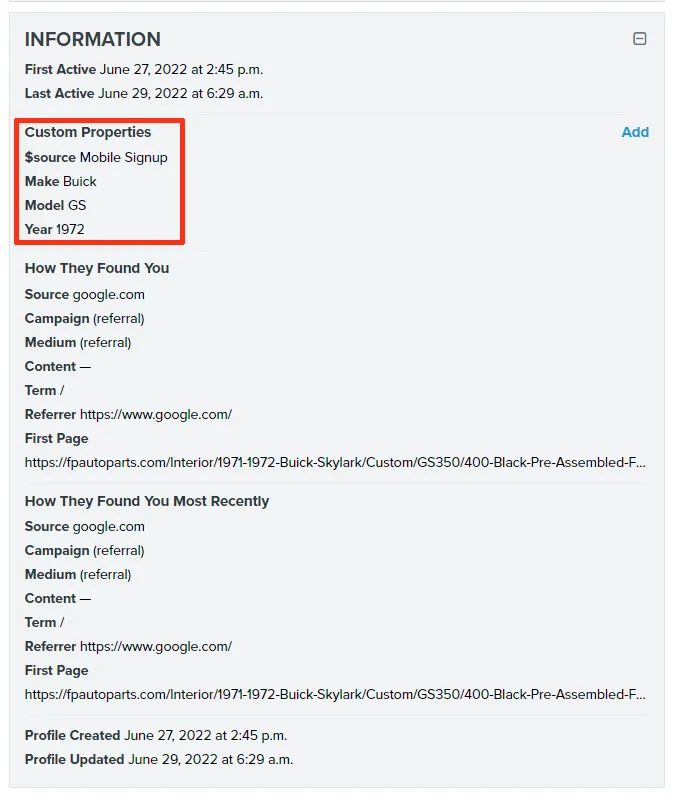
The last vehicle the user selects is saved in the profile information.
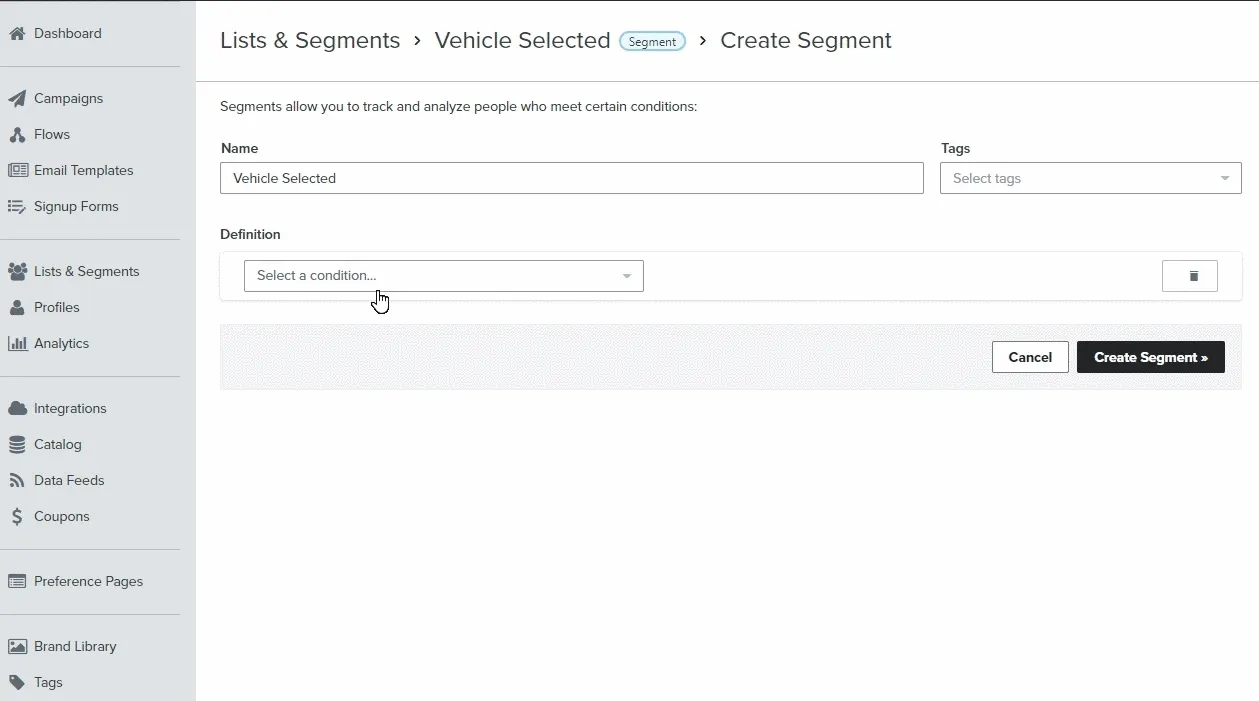
For example, it can be a segment based on the history of actions. Type “Make” or “Model” to find these values inside “Choose a property”:
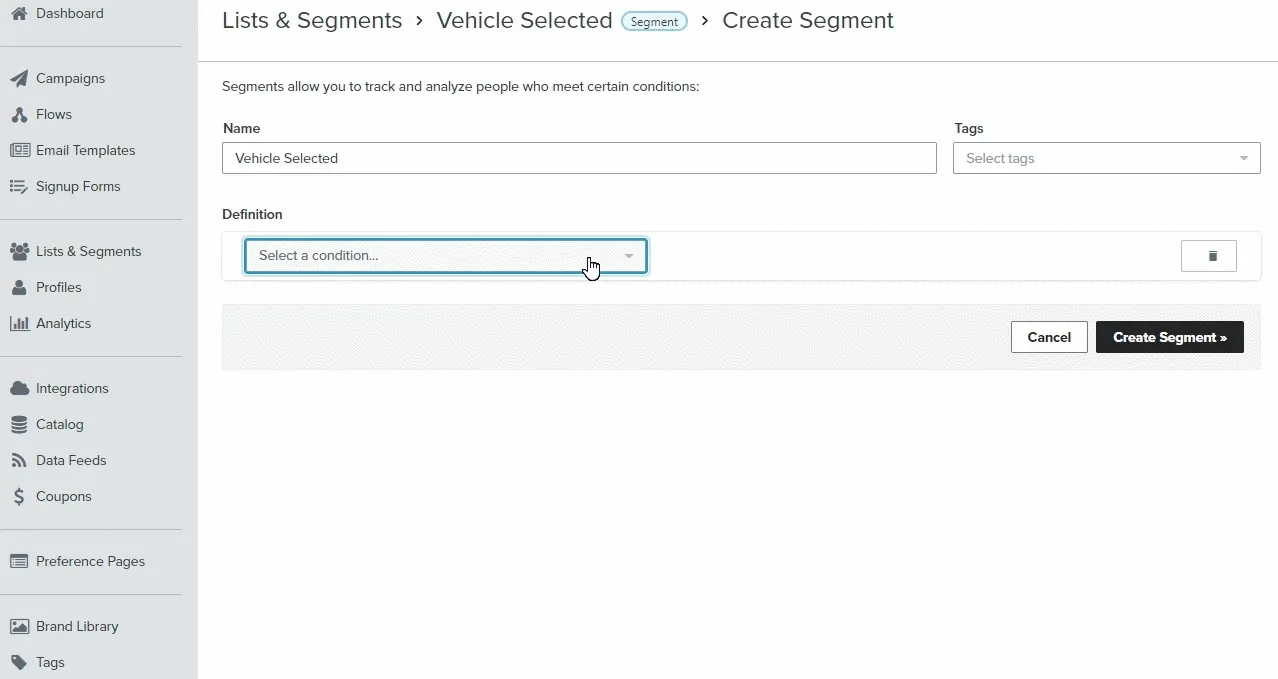
Or the segment that is based on the profile information:
How Klaviyo Metrics work
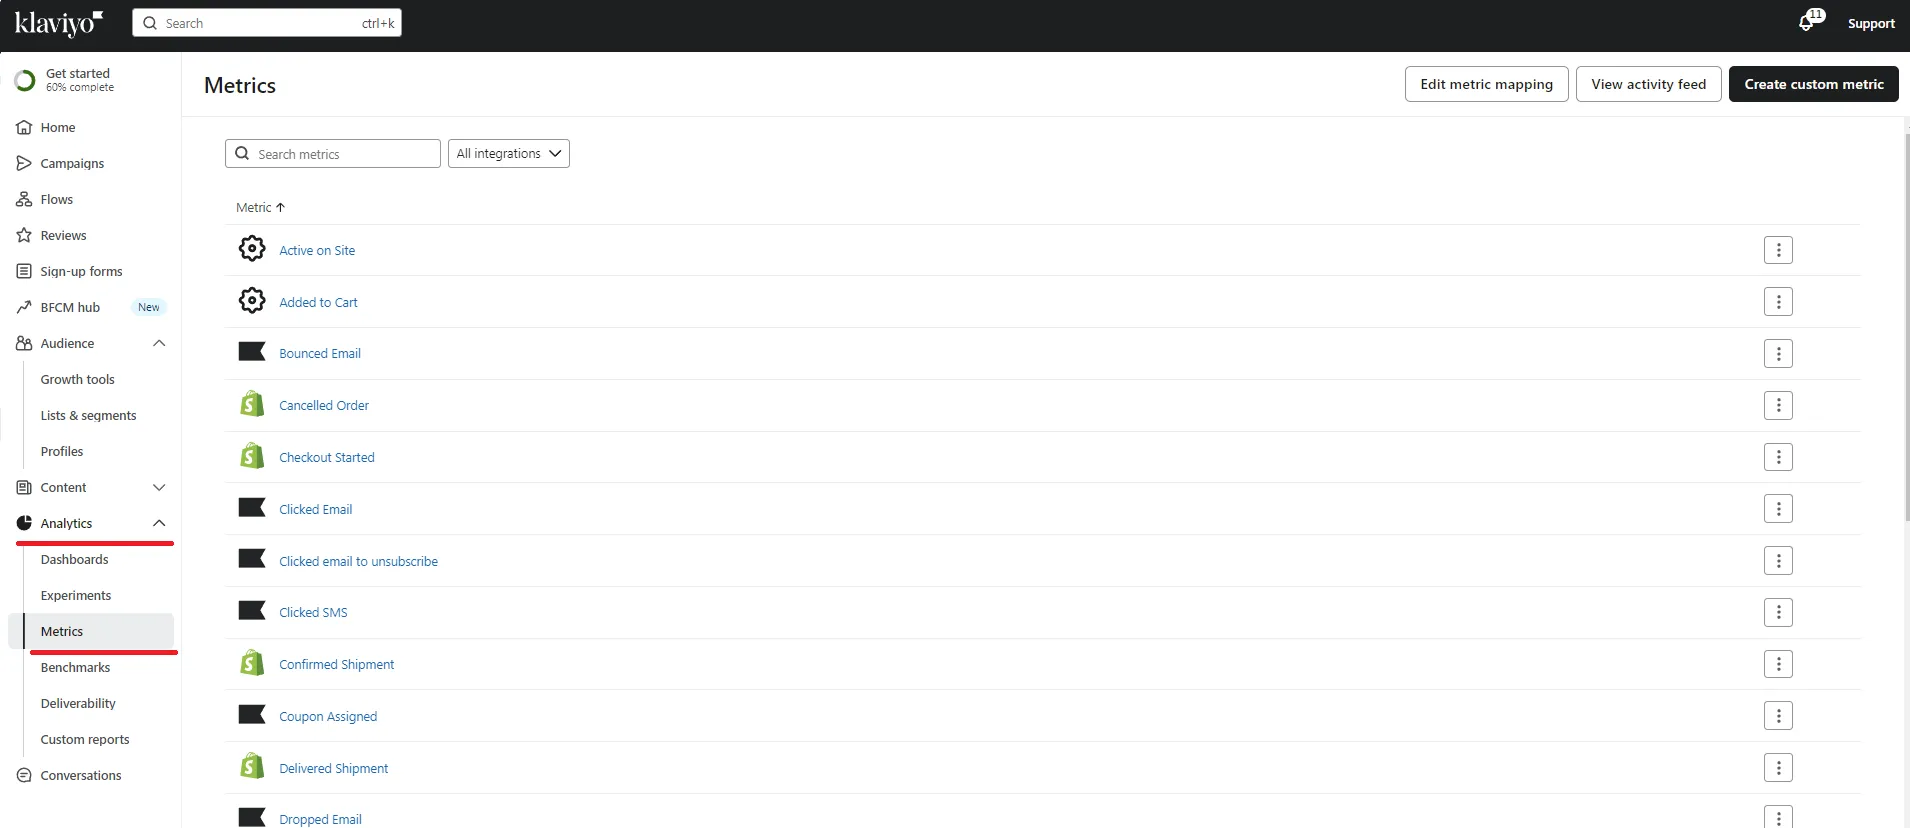
Section titled “How Klaviyo Metrics work”In Klaviyo, there are events like Viewed Product or Added to Cart. These events are used to track metrics.
Most of the events work without adding code to the site templates.
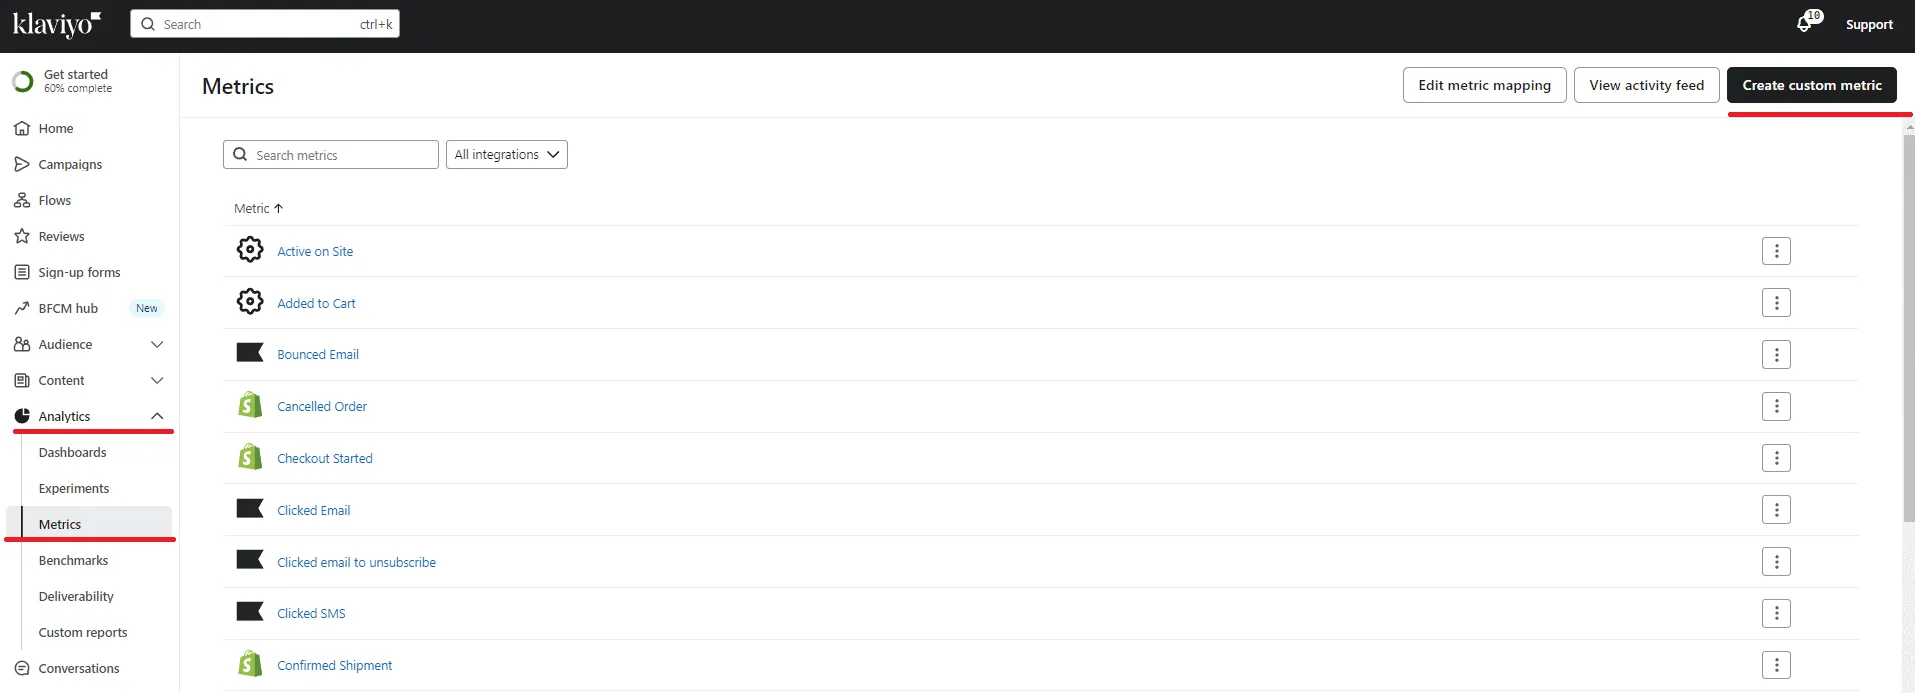
To confirm the events are working correctly, you need to look at a metric, such as Active on Site.
If one of the metrics is not tracking, you need to check if the events are triggered. To do this, go to Audience > Profiles and find your profile.
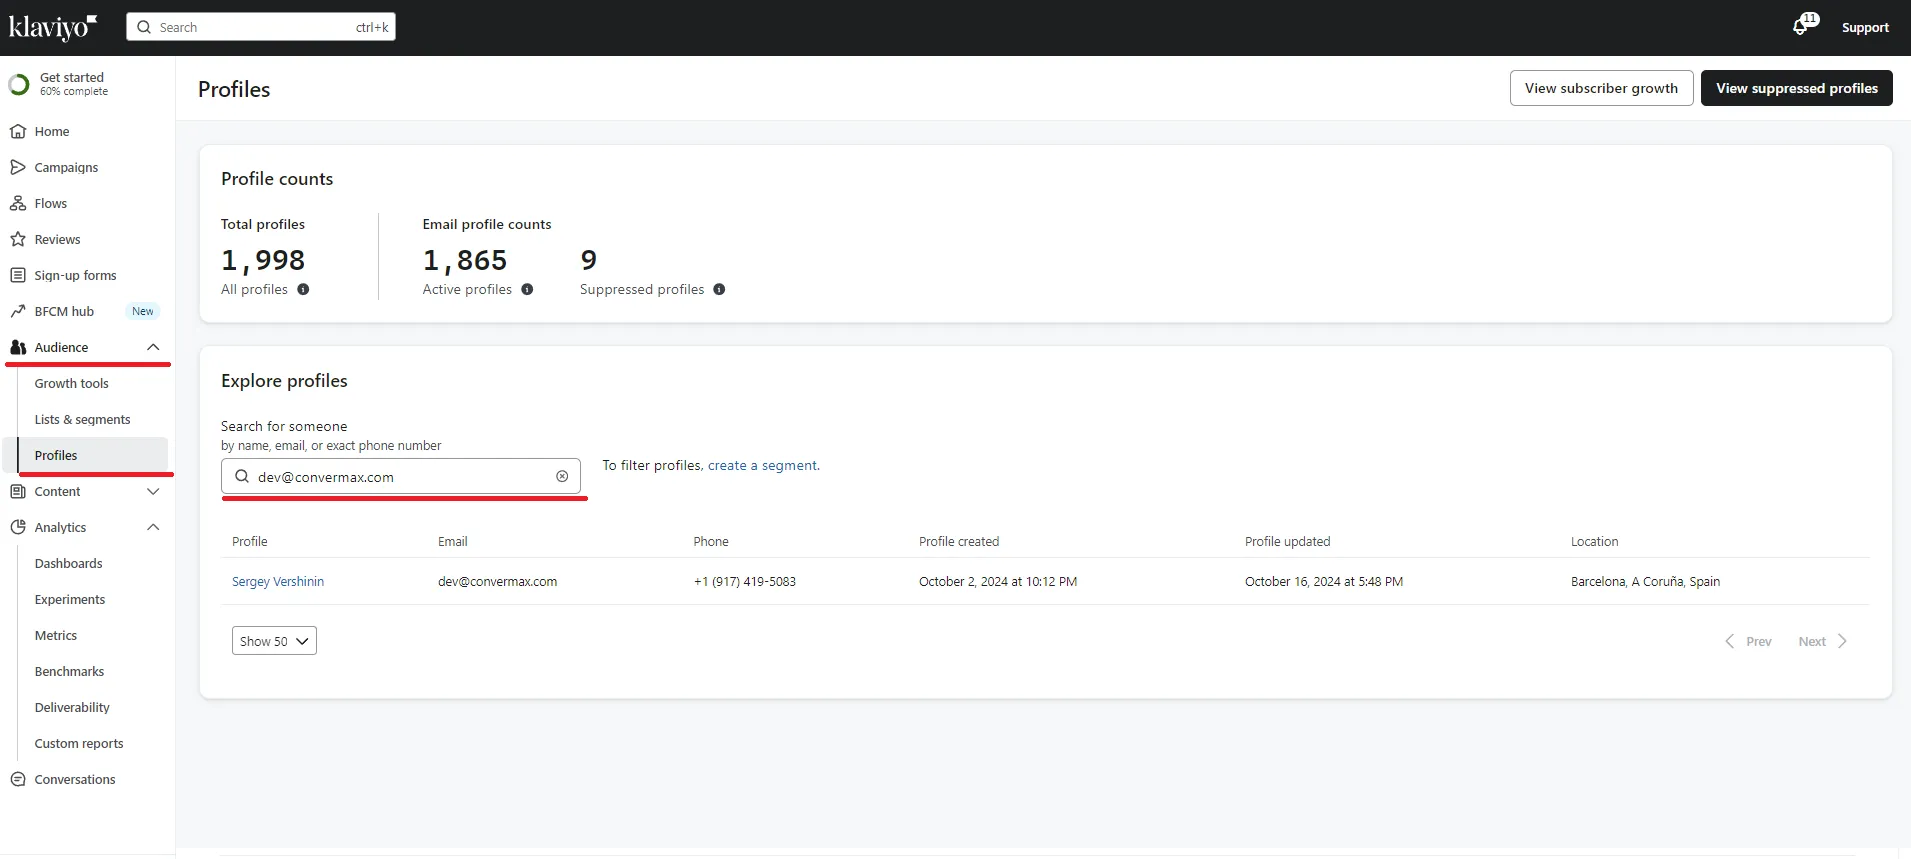
On the right side of the profile, you can see which events worked for this account and when.
If the right side of the profile is empty, you need to go to the site and check that Klaviyo is tracking the Active on Site metric. To do this, go to the site, e.g., www.your-site-example.com, and then add [email protected] to the address bar. The result should be [email protected].
![]()
After these manipulations, refresh the page. If Klaviyo is working correctly, the Active on Site event will be emitted and then displayed on the profile page.
Klaviyo does not track users out of the box when they simply log into their account in the store. To track users after they have logged in, you need to implement custom logic for logged-in users
Klaviyo tracks a user if they open a link from an email. To identify the user, Klaviyo uses the _kx parameter in the URL or when the user submits a Klaviyo form with their email address.
If the Active on Site trigger hasn’t worked out, maybe the event that is not tracked requires a snippet code to be added to the corresponding page. For example, such is required for the Added to Cart event.
First, you need to check that Shopify has Klaviyo integration enabled. To do this, go to Themes > Customize > App embeds and make sure that Klaviyo Onsite Javascript is enabled. If it is disabled, enable it and try tracking the Active on Site event again.


If the Active on Site event has not worked, check that the integration is enabled in the Klaviyo admin. To do this inside your store’s dashboard, go to Apps > Klaviyo: Email Marketing & SMS. You will be redirected to the Klaviyo admin dashboard to the integrations page. Then, make sure the tracking is enabled in the Onsite Tracking section.

If in the Onsite Tracking section tracking is enabled, but the events are still not tracked, you need to go to your profile in the Klaviyo admin dashboard and make sure that there is an event you are trying to track. If there is no event, you need to add it and check that after these manipulations the event is tracked.


For example, to track the Added to Cart trigger, you need to insert the snippet code into the product page or another page. The snippet code can be found at https://help.klaviyo.com/.
What information do we provide to Klaviyo
Section titled “What information do we provide to Klaviyo”Klaviyo also supports custom metrics based on desired events.

Vehicle Selected. The way it works:
- The user selects a vehicle.
- We send it to Klaviyo.
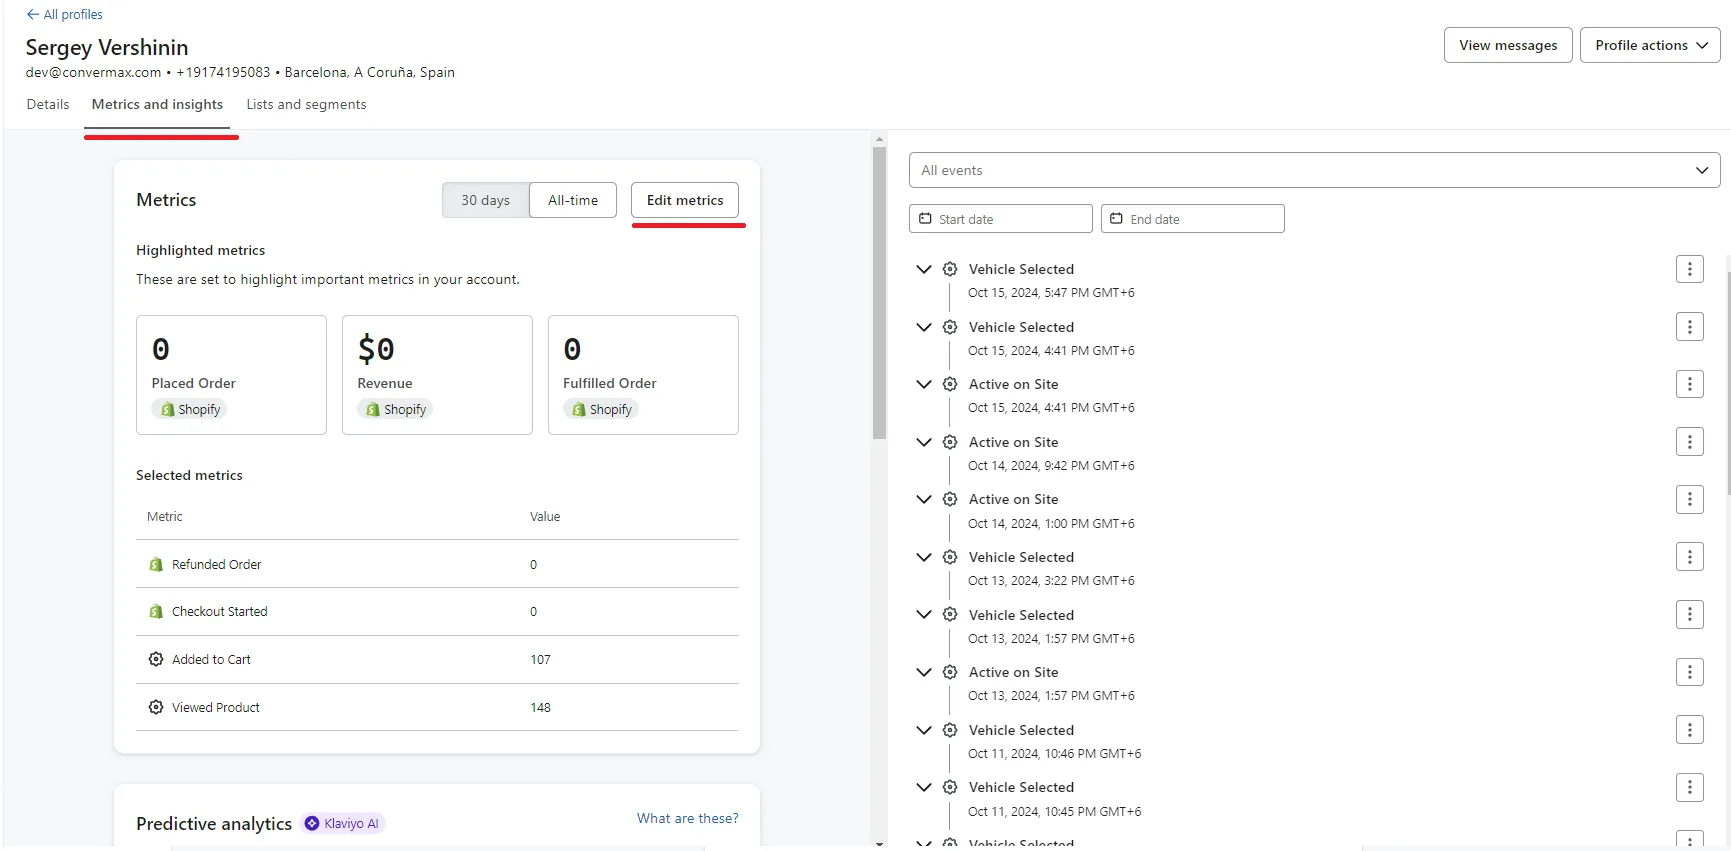
Once the user has selected a vehicle, the event will be displayed in the user’s profile:

The metric results, based on the Vehicle Selected events, can look like this:

Moreover, the last selected vehicle is saved to the user’s profile. It can be seen at Details > Custom properties: